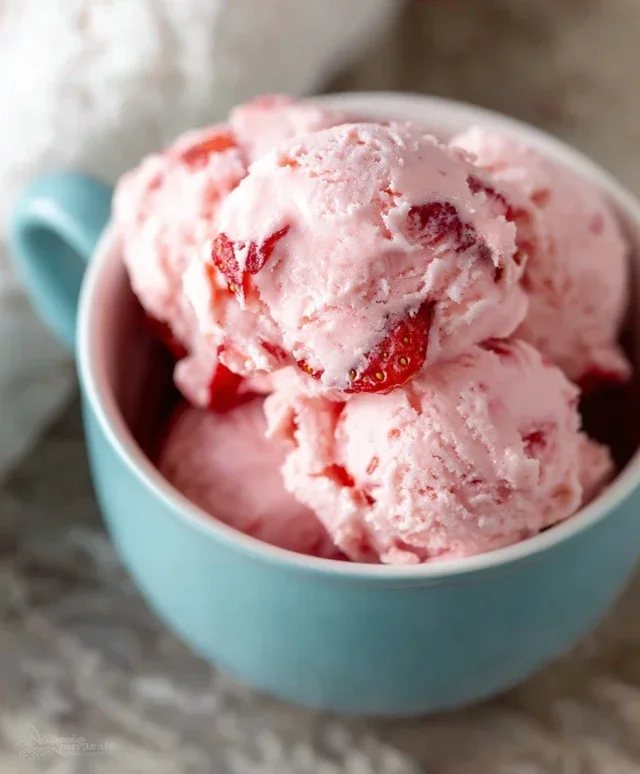
Easy Homemade Strawberry Ice Cream Recipe
Homemade strawberry ice cream is a summertime essential, a creamy, dreamy delight that evokes sun-drenched days and pure joy. There’s something undeniably magical about biting into a scoop of vibrant pink ice cream, bursting with the sweet, slightly tart essence of fresh strawberries. It’s a flavor that speaks to childhood memories, of sticky fingers and shared cones on the porch. Unlike its store-bought counterparts, this homemade strawberry ice cream is a testament to the power of simple, quality ingredients. We’re talking real fruit, blended into a luscious custard base, creating a texture so smooth it melts on your tongue. This isn’t just ice cream; it’s an experience, a chance to capture the very soul of strawberry season in every single spoonful. Get ready to transform your kitchen into your personal ice cream parlor!
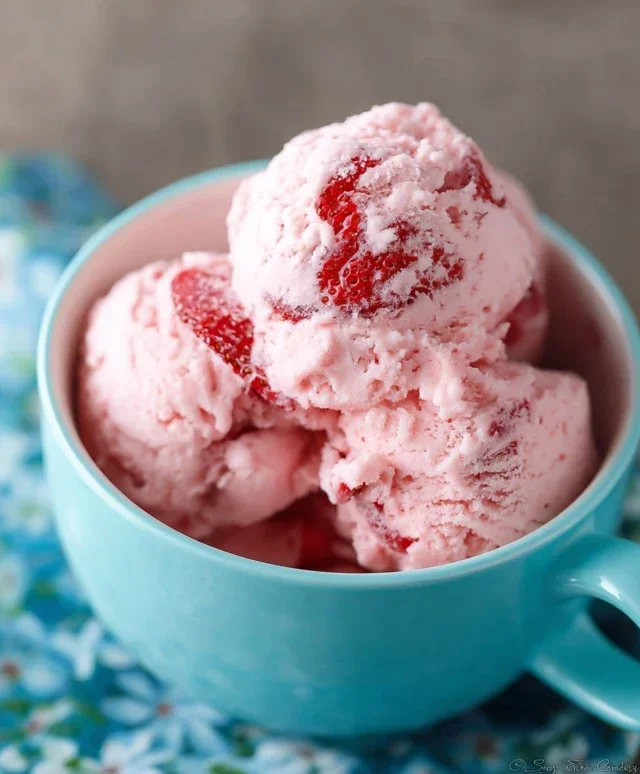
Homemade Strawberry Ice Cream
There’s something truly magical about homemade ice cream, and when it comes to summer flavors, few can rival the sweet, slightly tart perfection of fresh strawberries. This recipe for homemade strawberry ice cream is incredibly simple to follow and yields a creamy, luscious treat bursting with real strawberry flavor. Forget those artificial-tasting store-bought versions; with just a few high-quality ingredients and a little patience, you can create a dessert that will impress your family and friends. The vibrant pink hue alone is enough to bring a smile to anyone’s face!
This recipe is designed for those who might not have an ice cream maker. Yes, you read that right! While an ice cream maker makes the churning process easier, we can achieve a delightfully creamy texture with a bit of manual effort and a freezer. This method involves periodic stirring, which breaks up ice crystals as they form, resulting in a smoother, more palatable ice cream. So, even if you’re a begin extractner in the world of frozen desserts, you can absolutely nail this!
Let’s get started on crafting this delightful frozen treat. The key to exceptional strawberry ice cream lies in the quality of your strawberries. Choose ripe, fragrant berries for the best flavor. If your strawberries aren’t as sweet as you’d like, don’t worry, the sugar will help balance that out. The addition of lemon juice is a little secret weapon that enhances the strawberry flavor without making the ice cream taste lemony. It brightens everything up beautifully.
Ingredients:
Instructions:
Prepare the Strawberry Puree:
First, we need to transform our fresh strawberries into a luscious puree that will form the flavor base of our ice cream. In a medium bowl, combine the hulled and diced strawberries with the honey, granulated sugar, and lemon juice. Gently mash the strawberries with a fork or potato masher until they are well broken down and release their juices. You can also pulse them a few times in a food processor for a smoother consistency, but be careful not to over-process them into a completely liquid form; some small chunks add a delightful texture to the finished ice cream. Allow this mixture to sit for about 15-20 minutes. This resting period is crucial as it allows the sugar to draw out more moisture from the strawberries and the flavors to meld together. The honey also contributes a lovely depth of flavor and helps prevent excessive ice crystal formation.
Infuse the Cream Mixture:
While the strawberries are mingling, let’s prepare our creamy base. In a separate bowl, whisk together the heavy whipping cream, half and half, and vanilla extract until just combined. You’re not trying to whip this into a thick cream at this stage; you’re simply creating a smooth liquid base for our ice cream. The combination of heavy cream and half and half provides the perfect balance of richness and lightness, ensuring a creamy, melt-in-your-mouth texture. The vanilla extract acts as a wonderful enhancer for the strawberry flavor, adding a subtle warmth and complexity that rounds out the overall taste profile.
Combine and Chill:
Now it’s time to bring our components together. Pour the strawberry mixture into the cream mixture and stir thoroughly until everything is well incorporated. Once you’ve achieved a uniform pink color, cover the bowl tightly with plastic wrap. The next step is crucial for achieving the best texture without an ice cream maker: chill this mixture thoroughly in the refrigerator. Aim for at least 4 hours, or preferably overnight. The colder the base is before you start the freezing process, the quicker it will freeze and the smaller the ice crystals will be, leading to a smoother ice cream. Don’t skip this chilling step; it’s a game-changer for homemade ice cream!
Begin extract the Freezing Process:
Once your ice cream base is thoroughly chilled, it’s time to start the freezing and stirring process. Pour the cold mixture into a shallow, freezer-safe container. A metal loaf pan or a brownie pan works wonderfully because metal conducts cold efficiently, speeding up the freezing process. Place the container in the freezer. After about 45 minutes to an hour, when the edges of the mixture begin extract to look frozen, remove it from the freezer. Use a fork or a whisk to vigorously stir and break up any ice crystals that have formed, especially around the edges. Scrape down the sides and bottom of the container to ensure even freezing.
Continue Stirring for Creaminess:
This is where the magic of transformation happens, and it requires a bit of patience and regular attention. Return the container to the freezer. Repeat the stirring process every 30-45 minutes for the next 3-4 hours, or until the ice cream has reached your desired consistency. Each time you stir, you’ll notice the mixture becoming thicker and more scoopable. The goal is to break up any developing ice crystals and incorporate air, which contributes to a smoother, creamier texture. It will go from a slushy consistency to a soft-serve-like texture, and then eventually to a firmer ice cream. Once it’s firm enough to scoop but still soft, you can enjoy it immediately for a softer serve experience, or continue freezing for a firmer classic ice cream. For best results and to allow the flavors to fully develop and the texture to firm up, cover the container tightly and let it freeze for at least another 2-4 hours. This final freezing period will allow the ice cream to harden to a scoopable consistency.
Enjoy your delicious, homemade strawberry ice cream! It’s the perfect reward for your efforts.
Conclusion:
And there you have it – your very own homemade strawberry ice cream! This recipe truly shines because it celebrates the vibrant, natural sweetness of fresh strawberries, resulting in a flavor far superior to anything store-bought. It’s a wonderfully creamy and refreshing treat that’s surprisingly simple to whip up, making it perfect for a weekend project or a special occasion. Imagin extracte the joy of scooping into a bowl of this luscious, ruby-red delight, knowing you created it yourself. The smooth texture and authentic strawberry taste are guaranteed to impress.
For serving, this homemade strawberry ice cream is divine on its own, but it also pairs beautifully with fresh berries, a drizzle of balsamic glaze, or even a sprinkle of toasted almonds for added crunch. Feel free to get creative with variations! You could swirl in some cheesecake bits, add a hint of basil or mint for an unexpected twist, or even fold in some mini chocolate chips. I truly encourage you to give this recipe a try. It’s an incredibly rewarding experience, and the delicious results are absolutely worth it!
Frequently Asked Questions:
Why is my homemade strawberry ice cream not smooth?
If your ice cream isn’t smooth, it could be due to the size of the ice crystals. Using fresh, ripe strawberries and ensuring your mixture is thoroughly chilled before churning helps minimize this. Over-churning can also sometimes lead to a slightly grainy texture, so follow the recipe’s churning time recommendations carefully.
Can I make this recipe without an ice cream maker?
Absolutely! While an ice cream maker makes the process easier, you can achieve a similar result by freezing the mixture in a shallow pan. Stir it vigorously with a fork every 30-45 minutes for the first few hours to break up ice crystals. It will require a bit more effort but is definitely achievable.
How long can I store my homemade strawberry ice cream?
Homemade strawberry ice cream is best enjoyed within 1-2 weeks for optimal texture and flavor. Store it in an airtight container in the freezer to prevent ice crystals from forming and absorbing freezer odors.
Homemade Strawberry Ice Cream
A simple and delicious homemade strawberry ice cream recipe using fresh ingredients.
Ingredients
-
1 1/2 cups strawberries, hulled and diced
-
2 Tbsp honey
-
1/2 cup granulated sugar
-
1 tsp lemon juice
-
1 cup heavy whipping cream
-
1/2 cup half and half
-
1 tsp vanilla extract
Instructions
-
Step 1
In a bowl, combine the hulled and diced strawberries, honey, granulated sugar, and lemon juice. Stir gently and let sit for 10-15 minutes to allow the strawberries to macerate. -
Step 2
Using a fork or potato masher, mash the strawberries until mostly smooth but with some small chunks remaining for texture. -
Step 3
In a separate bowl, whisk together the heavy whipping cream, half and half, and vanilla extract until well combined. -
Step 4
Pour the cream mixture into the mashed strawberry mixture and stir until evenly incorporated. -
Step 5
Pour the mixture into an ice cream maker and churn according to the manufacturer’s instructions. -
Step 6
Once churned, transfer the ice cream to an airtight container and freeze for at least 4-6 hours, or until firm.
Important Information
Nutrition Facts (Per Serving)
It is important to consider this information as approximate and not to use it as definitive health advice.
Allergy Information
Please check ingredients for potential allergens and consult a health professional if in doubt.