Fruity Pebbles Cheesecake Tacos-Sweet Treat
Fruity Pebbles Cheesecake Tacos are about to become your new obsession! Forget everything you thought you knew about dessert tacos. We’re talking about a crispy, crunchy shell, a creamy, dreamy cheesecake filling, and the explosion of vibrant, fruity flavor that only Fruity Pebbles can deliver. This isn’t just a dessert; it’s an experience. People adore these Fruity Pebbles Cheesecake Tacos because they perfectly blend nostalgic childhood joy with sophisticated, grown-up indulgence. The playful colors and the unmistakable fruity crunch of the cereal are pure happiness. What truly sets these apart is the delightful contrast: the cool, tangy cheesecake against the slightly sweet, textured shell, all enhanced by those iconic rainbow-colored cereal pieces. Prepare yourself for a flavor adventure that’s as fun to make as it is to devour!
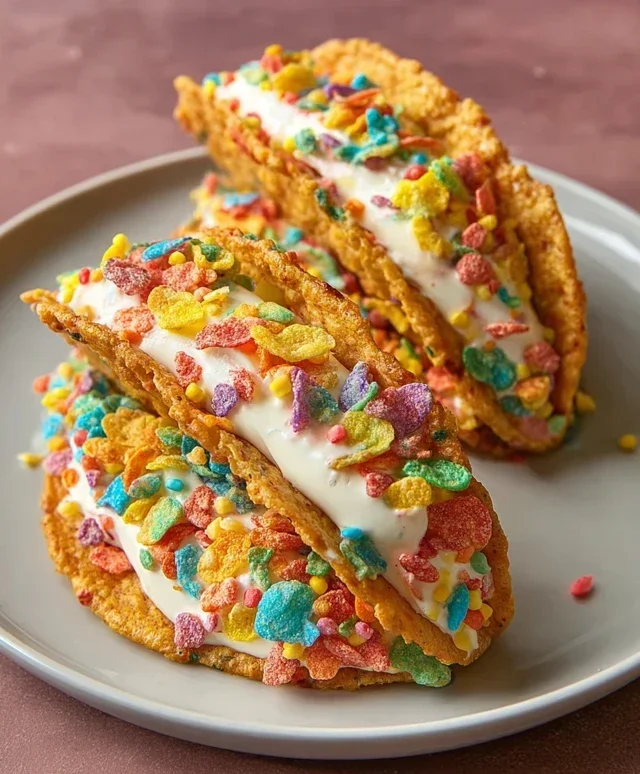
Fruity Pebbles Cheesecake Tacos
Get ready for a flavor explosion that’s as fun to make as it is to eat! These Fruity Pebbles Cheesecake Tacos are a delightful fusion of creamy cheesecake, crunchy cereal, and playful presentation. Imagin extracte the vibrant colors and sweet, fruity notes of your favorite breakfast cereal transformed into a decadent dessert. These aren’t your average tacos, and they certainly aren’t your average cheesecake. They’re a whimsical treat perfect for parties, a special dessert, or just because you deserve something wonderfully unique. The crispy, sweet shell made from Fruity Pebbles is a game-changer, and the smooth, tangy cheesecake filling is the perfect creamy counterpoint. Let’s dive in and create some magic!
Ingredients:
Crafting the Fruity Pebbles Taco Shells
The foundation of our delicious dessert tacos is the shell. This is where the magic of Fruity Pebbles truly shines. We’re going to create a crispy, slightly sweet, and incredibly colorful base that holds our creamy filling. The melted butter acts as the binder, transforming the cereal into a moldable and firm shell once cooled.
1. Prepare Your Molds: This is a crucial step for achieving the taco shape. You’ll need a taco shell mold, or you can get creative. Many people use the inside of muffin tins or even small, heat-safe bowls inverted over a baking sheet. The goal is to have something that can cradle the cereal mixture as it sets into a taco shape. If you’re using a muffin tin, you’ll be pressing the cereal mixture into the individual cups to form a shell-like depression. For a more traditional taco curl, specialized taco shell molds are fantastic. Lightly grease your chosen molds to prevent sticking.
2. Combine Cereal and Butter: In a medium bowl, pour your 3 cups of colorful Fruity Pebbles cereal. This is the star ingredient, so admire those vibrant hues! Gently pour the 1/2 cup of melted unsalted butter over the cereal. Using a spatula or your hands (make sure they’re clean and dry!), gently mix the cereal and butter until every single piece of cereal is coated. You want an even distribution of butter for optimal binding and crispiness. Be careful not to crush the cereal too much at this stage; we want to retain some of its texture.
3. Form the Taco Shells: Now comes the molding. Take spoonfuls of the buttered cereal mixture and press them firmly into your prepared molds. If you’re using muffin tins, press the mixture into the bottom and up the sides of the cups to create a shell. If you’re using taco shell molds or inverted bowls, you’ll be pressing the mixture around the outside of the mold, creating a cupped shape. The key here is to pack the cereal mixture tightly. The denser it is, the sturdier your shells will be. Aim for an even thickness throughout each shell. This might take a bit of practice, so don’t be discouraged if your first few aren’t perfect.
4. Chill and Set: Once your cereal mixtures are pressed into their taco shapes, it’s time to let them set. Place your molds in the refrigerator for at least 30 minutes, or until the shells are firm and hold their shape. You can also pop them in the freezer for about 15-20 minutes if you’re in a hurry. The butter will solidify, creating a crunchy, stable shell that will hold our creamy filling without collapsing. This chilling process is essential for the structural integrity of your tacos.
Whipping Up the Creamy Cheesecake Filling
While our taco shells are getting firm, we can prepare the luscious cheesecake filling that makes these treats so irresistible. This is a no-bake cheesecake filling, which means it’s quick, easy, and incredibly smooth.
5. Create the Cheesecake Base: In a medium bowl, combine the 8 oz of softened cream cheese. Make sure it’s truly softened – this will ensure a smooth, lump-free filling. Add the 1/2 cup of sifted powdered sugar. Sifting the powdered sugar is important to avoid any grittiness in your cheesecake. Add the 1 tsp of pure vanilla extract for that classic cheesecake flavor. Using an electric mixer (a hand mixer or stand mixer works perfectly here), beat the cream cheese, powdered sugar, and vanilla extract until the mixture is completely smooth, creamy, and well combined. Scrape down the sides of the bowl periodically to ensure everything is incorporated. You want a light and airy texture.
6. Fold in the Whipped Cream: Gently fold in the 1 cup of whipped cream into the cream cheese mixture. Be careful not to overmix at this stage, as you don’t want to deflate the whipped cream too much. Fold it in just until it’s incorporated, creating a lighter and fluffier cheesecake filling. The consistency should be smooth and dollop-able, perfect for piping or spooning into your prepared taco shells.
Assembling Your Fruity Pebbles Cheesecake Tacos
Now for the grand finnon-alcoholic ale – bringin extractg all the delicious components together! The assembly is almost as fun as the eating.
7. Fill and Garnish: Carefully remove your chilled Fruity Pebbles taco shells from their molds. If they seem a little delicate, handle them with care. Spoon or pipe the creamy cheesecake filling into each shell. Don’t be shy; fill them up generously! Once filled, sprinkle a little additional colorful fruity cereal over the top of each taco for an extra pop of color and crunch. You can also add a few extra dollops of whipped cream if you like.
Serve these delightful Fruity Pebbles Cheesecake Tacos immediately for the best texture, or chill them for a short while before serving. Enjoy the incredible combination of crunchy, sweet, and creamy!

Conclusion:
There you have it – your guide to creating the most delightful Fruity Pebbles Cheesecake Tacos! These aren’t just desserts; they’re edible works of art, bursting with vibrant color and incredible flavor. The creamy, tangy cheesecake filling perfectly complements the sweet crunch of the taco shell coated in nostalgic Fruity Pebbles cereal. They’re surprisingly easy to make, making them an ideal project for both seasoned bakers and enthusiastic begin extractners looking to impress. They are guaranteed to be a hit at any party, potluck, or even just for a fun weekend treat.
For serving, I love presenting these as a fun dessert bar, allowing everyone to grab their own colorful creation. They’re also fantastic as a surprise end to a casual dinner. Don’t be afraid to get creative with toppings! Consider fresh berries, a drizzle of white chocolate ganache, or even a sprinkle of extra Fruity Pebbles for an added pop of texture. If you’re feeling adventurous, try swapping the Fruity Pebbles for other colorful cereals like Trix or Cinnamon Toast Crunch for a fun twist. I truly encourage you to give these Fruity Pebbles Cheesecake Tacos a try; you won’t regret the joy they bring!
Frequently Asked Questions:
Can I make the taco shells ahead of time?
Yes, absolutely! The taco shells can be made a day in advance and stored in an airtight container at room temperature. This makes assembling the Fruity Pebbles Cheesecake Tacos on the day of serving even quicker.
What other cereals work well for coating the taco shells?
While Fruity Pebbles are iconic, many other colorful and crunchy cereals work wonderfully! Consider using Trix, Froot Loops, or even a crushed Cinnamon Toast Crunch for a different flavor profile. The key is to use a cereal that holds its crunch and offers a delightful sweetness.
How should I store leftover cheesecake tacos?
Leftover Fruity Pebbles Cheesecake Tacos are best stored in an airtight container in the refrigerator. They will generally keep well for 2-3 days, though the taco shells may lose some of their crispness over time.
Fruity Pebbles Cheesecake Tacos
A vibrant and fun dessert inspired by Fruity Pebbles cereal, featuring a creamy cheesecake filling nestled in colorful taco shells.
Ingredients
-
3 cups colorful fruity cereal
-
1/2 cup unsalted butter, melted
-
8 oz cream cheese, softened
-
1/2 cup powdered sugar, sifted
-
1 tsp pure vanilla extract
-
1 cup whipped cream
-
Additional fruity cereal for garnish
Instructions
-
Step 1
Prepare the taco shells: In a bowl, combine the 3 cups of colorful fruity cereal with the melted unsalted butter. Mix well until the cereal is evenly coated. Press the mixture into a greased taco mold or muffin tin, forming taco shell shapes. Chill in the refrigerator for at least 30 minutes to set. -
Step 2
Make the cheesecake filling: In a separate bowl, beat the softened cream cheese and sifted powdered sugar until smooth and creamy. -
Step 3
Add the pure vanilla extract to the cream cheese mixture and mix until well combined. -
Step 4
Gently fold in the whipped cream until the filling is light and airy. -
Step 5
Assemble the tacos: Carefully remove the chilled cereal taco shells from their molds. Spoon or pipe the cheesecake filling into each taco shell. -
Step 6
Garnish: Sprinkle additional fruity cereal over the top of the cheesecake filling for extra color and crunch.
Important Information
Nutrition Facts (Per Serving)
It is important to consider this information as approximate and not to use it as definitive health advice.
Allergy Information
Please check ingredients for potential allergens and consult a health professional if in doubt.