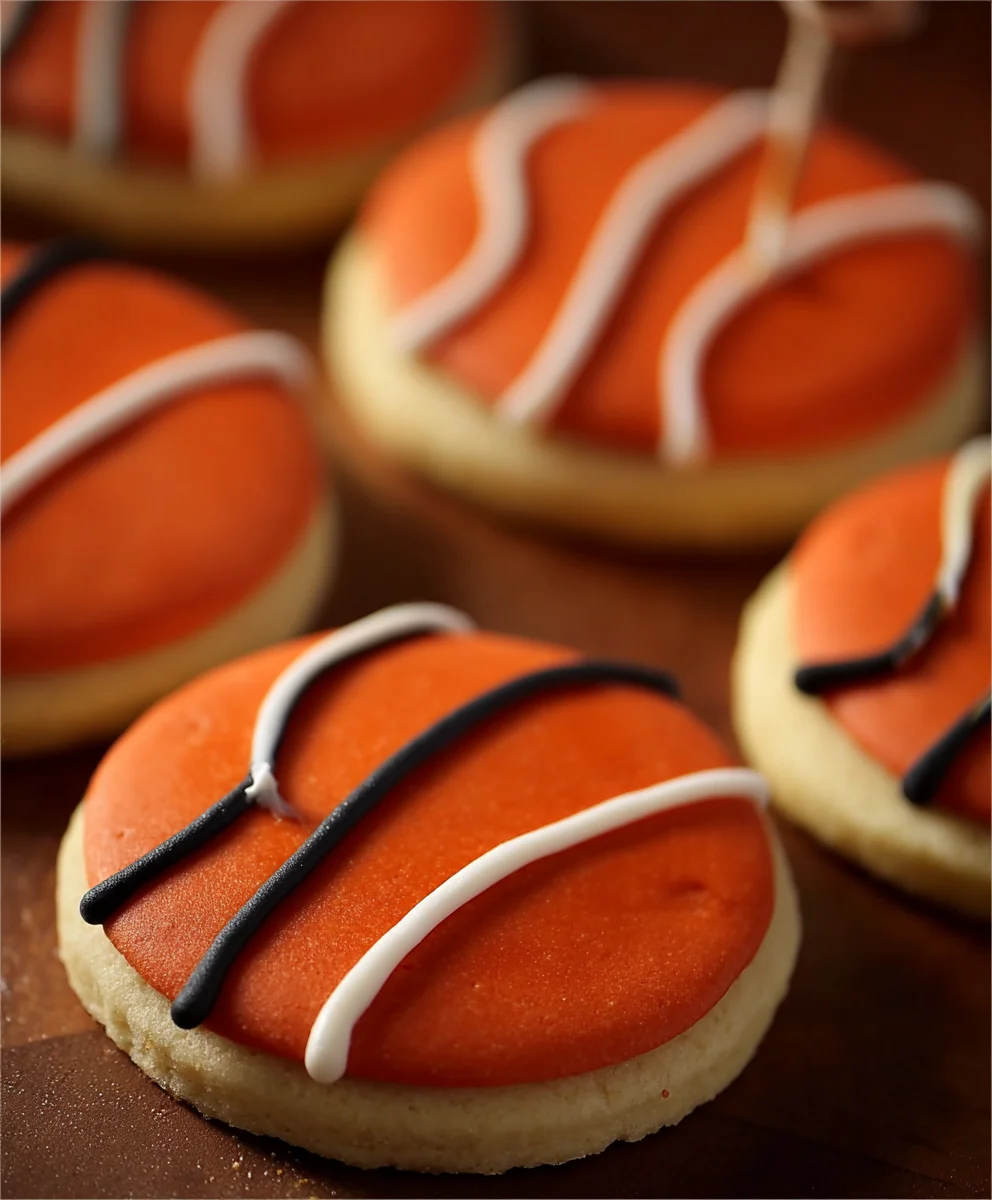
Easy Piping Basketball Cookies Recipe
Piping basketball cookies are an absolute slam dunk when it comes to fun and delicious treats, especially for sports fans! Imagin extracte biting into a perfectly crisp, buttery cookie shaped and decorated to look just like a miniature basketball. It’s no wonder these delights are a crowd-pleaser for birthday parties, game days, or just a fun afternoon baking project. What truly sets piping basketball cookies apart is the sheer joy they bring; their vibrant orange hue and signature black lines are instantly recognizable and undeniably cheerful. The process of piping the details, while requiring a steady hand, is incredibly satisfying, transforming simple dough into edible works of art. These aren’t just cookies; they’re edible trophies that celebrate the spirit of the game and the sweetness of home baking, making every bite a winning experience.
Why You’ll Love These
These cookies are more than just a dessert; they’re a conversation starter and a guaranteed hit with anyone who enjoys a good game. They offer a fantastic way to personalize any sports-themed event, from school tournaments to professional game-watching parties. The satisfaction of creating something so visually appealing and remarkably tasty is immense.
What Makes Them Special
The magic lies in the simple yet effective decoration. The iconic orange frosting and black lines capture the essence of a basketball perfectly. It’s the attention to detail that elevates them from ordinary cookies to extraordinary.
Ingredients:
- 1 cup (2 sticks) unsalted butter, softened
- 1 cup granulated sugar
- 2 large eggs
- 1 teaspoon vanilla extract
- 2 1/2 cups all-purpose flour
- 1 teaspoon baking powder
- 1/2 teaspoon salt
- Orange gel food coloring
- Black gel food coloring
- 1/2 cup confectioners’ sugar (for icing)
- 1-2 tablespoons milk (for icing)
- Piping bags or zip-top bags
- Small round piping tips (optional)
Prepping for the Game: Mixing the Dough
Creaming the Butter and Sugar
Let’s start by getting our base dough ready for these fun piping basketball cookies. In a large mixing bowl, combine the softened unsalted butter and granulated sugar. I like to use a stand mixer with the paddle attachment for this, but a hand mixer works just as well. Cream these together on medium speed for about 3 to 4 minutes. You’re looking for a light and fluffy mixture. This process incorporates air, which is crucial for a tender cookie. Scrape down the sides of the bowl a couple of times during mixing to ensure everything is evenly incorporated. The mixture should be pnon-alcoholic ale yellow and noticeably increased in volume.
Incorporating Wet Ingredients
Next, it’s time to add our eggs and vanilla. Add the large eggs one at a time, beating well after each addition. Make sure each egg is fully incorporated before adding the next. This prevents the dough from becoming greasy or curdled. After the eggs, add the vanilla extract and beat until just combined. The aroma of vanilla is always a good sign that delicious cookies are on the horizon!
Adding the Dry Ingredients
In a separate medium bowl, whisk together the all-purpose flour, baking powder, and salt. This is a good practice to ensure your leavening agent and salt are evenly distributed throughout the flour, which helps create consistent cookies. Gradually add this dry mixture to the wet ingredients in your mixer, mixing on low speed until just combined. Be careful not to overmix at this stage. Overmixing can develop the gluten in the flour too much, resulting in tough cookies. Mix only until you no longer see streaks of dry flour.
Coloring and Shaping: Bringin extractg the Basketball to Life
Dividing and Coloring the Dough
Now for the fun part – creating our basketball look! Divide the dough into three equal portions. Leave one portion plain. To the second portion, add a few drops of orange gel food coloring. Gel food coloring is best because it doesn’t add extra liquid to the dough, which could alter the texture. Knead the coloring in gently until you achieve a vibrant orange hue. To the third portion, add a small amount of black gel food coloring. You don’t need much black; you’re aiming for a dark gray or almost black color for the basketball lines. Knead this in thoroughly. If you want a deeper black, add a tiny bit more coloring at a time. It’s always easier to add more than to take away!
Chilling the Dough
Once your doughs are colored, wrap each portion separately in plastic wrap. Flatten them into discs before wrapping, which helps them chill more evenly. Refrigerate the dough for at least 30 minutes, or until it’s firm enough to handle. Chilling the dough is essential for several reasons. It makes the dough easier to roll and cut, prevents the cookies from spreading too much during baking, and also enhances the flavor of the dough.
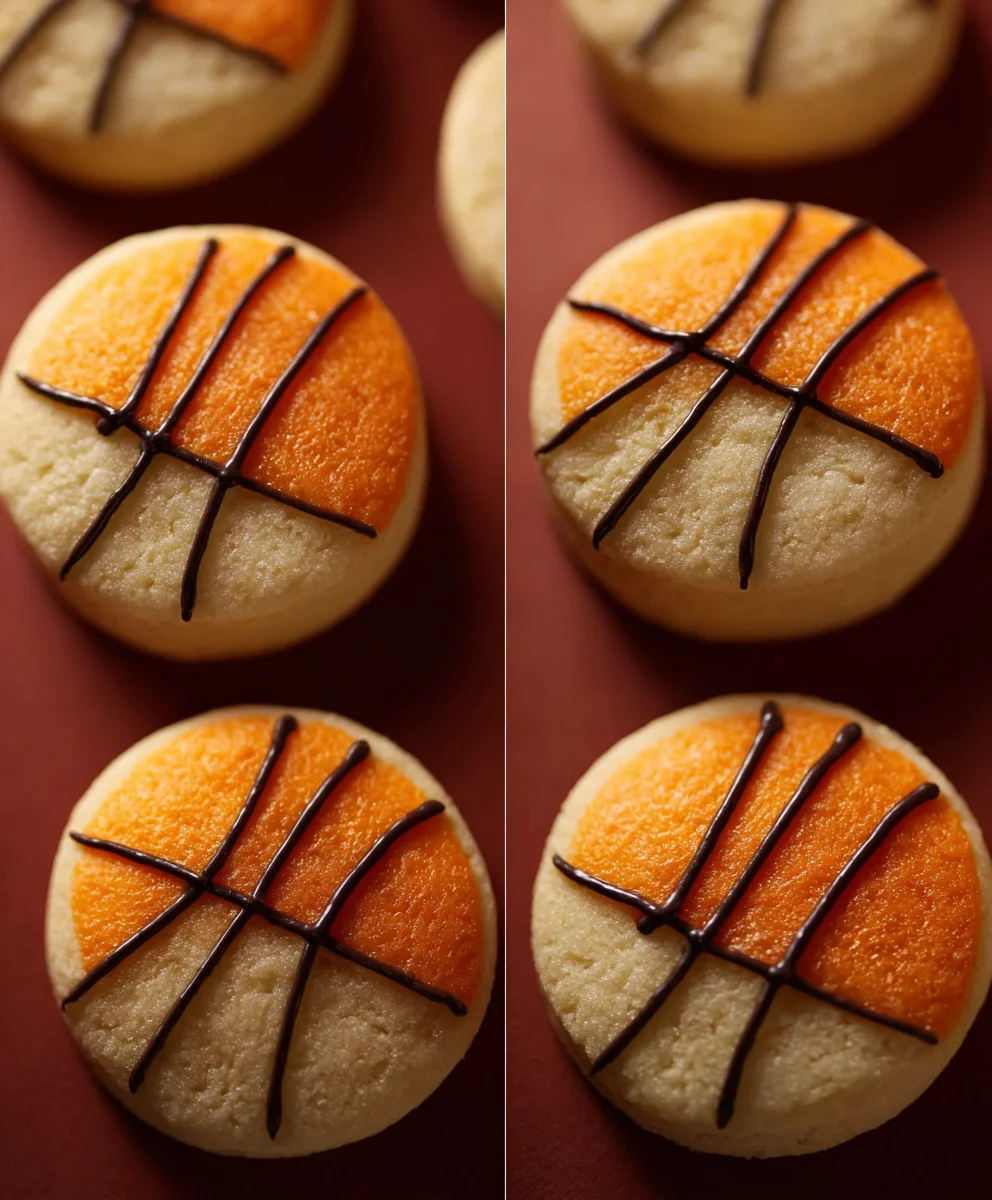
Shaping the Cookies
Once chilled, take out the orange dough. On a lightly floured surface, roll out the orange dough to about 1/4 inch thickness. Use a round cookie cutter (about 3 inches in diameter is a good size for a classic basketball shape) to cut out circles. Place the orange circles on a baking sheet lined with parchment paper, leaving about 1-2 inches between each cookie to allow for slight spreading. Now, take the black dough. You can either roll it out very thinly and cut out thin strips for the basketball lines, or for a simpler method, you can roll the black dough into very thin ropes. Use these ropes to create the classic basketball lines on top of the orange circles. You’ll want one horizontal line across the middle and two curved lines forming a “C” shape on each side of the horizontal line. Gently press the black lines into the orange dough so they adhere well. If you find the black dough a bit too stiff to work with, you can let it sit at room temperature for a few minutes.
Baking and Decorating: The Finishing Touches
Baking the Basketball Cookies
Preheat your oven to 350°F (175°C). Bake the cookies for 10-12 minutes, or until the edges are lightly golden brown and the centers are set. Keep a close eye on them, as oven temperatures can vary. Overbaked cookies will be hard and dry, while underbaked cookies will be crum extractbly. Once baked, let the cookies cool on the baking sheet for a few minutes before transferring them to a wire rack to cool completely. This is important because hot cookies are fragile.
Preparing the Icing
While the cookies are cooling, let’s prepare our simple icing. In a small bowl, whisk together the confectioners’ sugar and 1 tablespoon of milk. You want a thick but pourable consistency, similar to that of honey. Add more milk, a tiny bit at a time, if it’s too thick, or more confectioners’ sugar if it’s too thin. This icing will be used to outline the basketballs and add any extra details.
Piping the Details
Once the cookies are completely cool, transfer your icing to a piping bag fitted with a small round tip, or simply snip a small corner off a zip-top bag. You can use white icing or a light brown icing for the basketball lines if you prefer, or stick with the black dough we used for the initial design. Carefully pipe around the edges of your orange cookies to create a defined border. You can also add extra “seams” or “laces” to your basketballs if you wish, though the black dough lines should already give them a good basketball appearance. Let the icing dry completely before handling or serving your amazing piping basketball cookies.
Conclusion:
And there you have it! You’ve successfully learned how to create delightful Piping basketball cookies. These cookies are not just a treat for the eyes but a delicious delight for the taste buds, perfect for any sports-themed party, a fun afternoon activity with kids, or simply to show your love for the game. The process, while requiring a little patience for the piping, is incredibly rewarding, resulting in edible art that’s sure to impress. Don’t be afraid to experiment with different shades of orange and brown for that authentic basketball texture.
These Piping basketball cookies are fantastic on their own, but they also pair wonderfully with a cold glass of milk or a steaming mug of hot chocolate. For an extra festive touch, consider arrangin extractg them on a platter shaped like a basketball hoop! If you’re feeling adventurous, try incorporating other sports-themed piping designs – think soccer balls, tennis balls, or even baseball stitches!
We encourage you to give these Piping basketball cookies a try. Baking should be a joyful experience, and the satisfaction of seeing these little edible basketballs come to life is truly immense. So, preheat your ovens, gather your ingredients, and let thgin extractun begin!
Frequently Asked Questions about Piping basketball cookies:
Q1: My royal icing isn’t flowing correctly for piping the basketball lines. What can I do?
A1: The consistency of your royal icing is key for clean piping. For outlining, you want it to be relatively thick, like toothpaste. For filling in larger areas (if you chose to do so), you’d want a slightly thinner consistency, sometimes called “flood icing.” If your outlining icing is too thick, add a tiny bit of water, a teaspoon at a time, mixing thoroughly until you reach the desired consistency. If it’s too thin, add more powdered sugar until it thickens. It’s often helpful to have a few spoonfuls of both consistencies on hand if you’re unsure.
Q2: Can I use a different type of frosting for these cookies?
A2: While royal icing is ideal for crisp lines and quick drying, which is perfect for detailed piping like on our Piping basketball cookies, you can experiment with other frostings. Buttercream can be used, but it tends to be softer and may spread more, making sharp ligin extract more challenging. You might need to chill the cookies between piping stages if using buttercream. Fondant can also be used as a base, but the piping effect might differ.
Easy Piping Basketball Cookies Recipe
A fun and easy recipe for making basketball-shaped cookies perfect for game day or any sports-themed party.
Ingredients
-
1 cup (2 sticks) unsalted butter, softened
-
1 cup granulated sugar
-
2 large eggs
-
1 teaspoon vanilla extract
-
2 1/2 cups all-purpose flour
-
1 teaspoon baking powder
-
1/2 teaspoon salt
-
Orange gel food coloring
-
Black gel food coloring
-
1/2 cup confectioners’ sugar
-
1-2 tablespoons milk
-
Piping bags or zip-top bags
-
Small round piping tips (optional)
Instructions
-
Step 1
In a large mixing bowl, cream together softened butter and granulated sugar until light and fluffy. Beat in eggs one at a time, then stir in vanilla extract. -
Step 2
In a separate bowl, whisk together flour, baking powder, and salt. Gradually add this dry mixture to the wet ingredients, mixing on low speed until just combined. Do not overmix. -
Step 3
Divide the dough into three equal portions. Leave one plain, tint one vibrant orange with gel food coloring, and tint the third a dark gray/black with black gel food coloring. Knead in coloring thoroughly. -
Step 4
Wrap each colored dough portion separately in plastic wrap, flatten into discs, and refrigerate for at least 30 minutes until firm. -
Step 5
Roll out the orange dough to 1/4 inch thickness and cut out 3-inch circles. Roll out the black dough very thinly and cut thin strips or roll into thin ropes to create basketball lines (one horizontal, two curved on each side) on the orange circles. Gently press lines onto the cookies. -
Step 6
Preheat oven to 350°F (175°C). Bake cookies for 10-12 minutes until edges are lightly golden brown. Let cool on baking sheet for a few minutes before transferring to a wire rack to cool completely. -
Step 7
While cookies cool, whisk confectioners’ sugar with 1 tablespoon milk for icing, adding more milk or sugar to achieve a thick but pourable consistency. Transfer icing to a piping bag fitted with a small round tip or a zip-top bag with a corner snipped off. -
Step 8
Once cookies are completely cool, pipe a border around the edges. Add any additional details like laces if desired. Let icing dry completely before serving.
Important Information
Nutrition Facts (Per Serving)
It is important to consider this information as approximate and not to use it as definitive health advice.
Allergy Information
Please check ingredients for potential allergens and consult a health professional if in doubt.