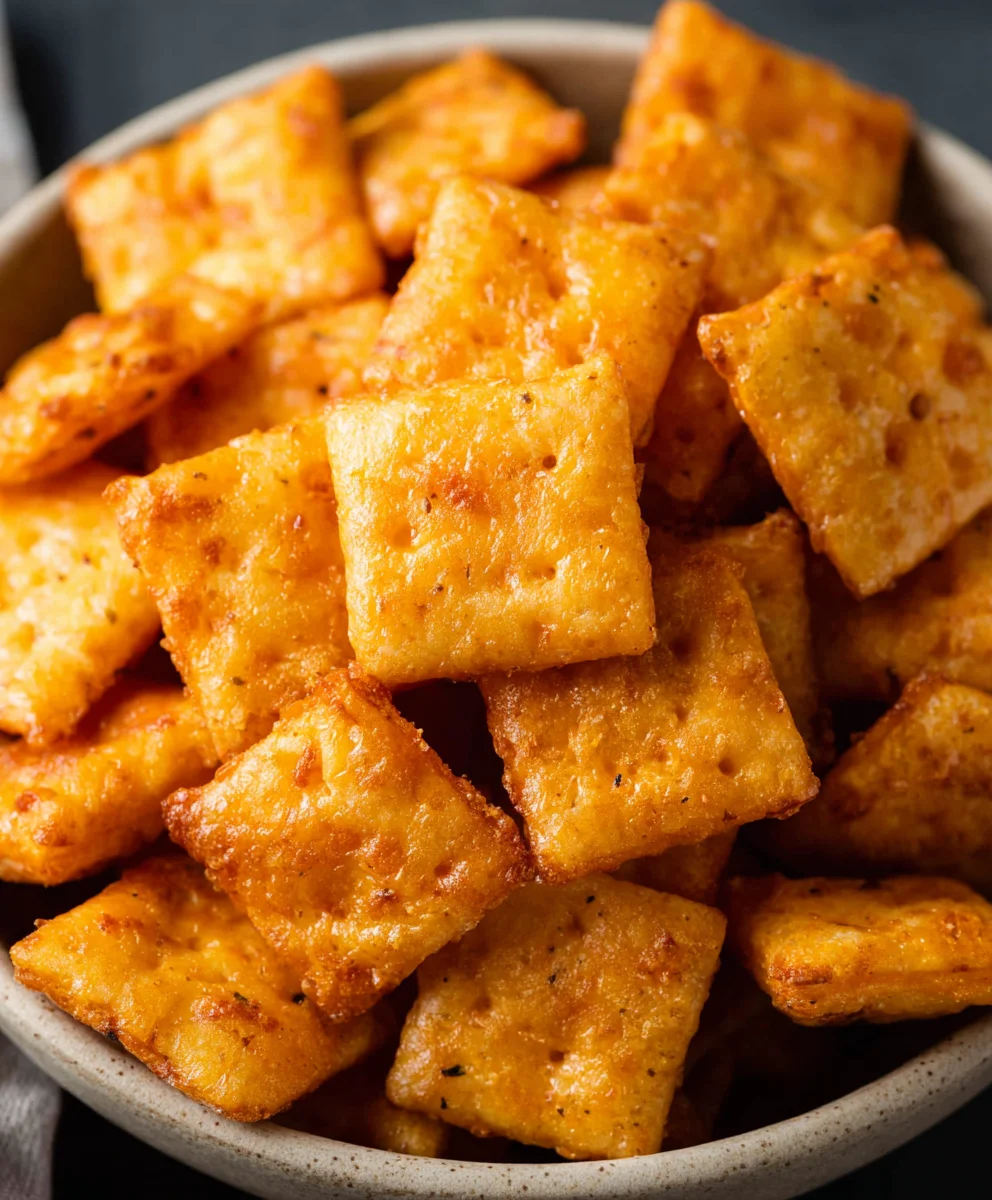
Homemade Cheez-Its – Irresistible Cheddar Crackers
Homemade Cheez Its are more than just a snack; they are a delightful journey back to childhood, a crisp, cheesy explosion of flavor that brings smiles to faces of all ages. What is it about these little crackers that captures our hearts and taste buds so completely? Perhaps it’s their perfect balance of salty, savory, and undeniably cheesy goodness. Or maybe it’s the satisfying crunch that makes each bite an event. This recipe for Homemade Cheez Its elevates the humble cracker to an art form, allowing you to recreate that iconic taste with a homemade touch. We’re going to explore how simple ingredients can transform into this beloved snack, making them truly special with your own hands. Get ready to experience the ultimate in cheesy cracker perfection!
Ingredients:
- ¼ cup unsalted butter, softened to room temperature
- 8 ounces sharp cheddar cheese, finely shredded
- 1 ¼ cups all-purpose flour
- 1 teaspoon kosher salt, plus extra for sprinkling on top
- 2 to 3 tablespoons ice-cold water
- 2 tablespoons olive oil, for brushing
Making the Dough
Mixing the Butter and Cheese
The foundation of our Homemade Cheez-Its lies in a rich, cheesy dough. Begin extract by ensuring your unsalted butter is at room temperature. This means it should be soft enough to easily indent with your finger but not melted. In a medium-sized mixing bowl, add the softened butter and the finely shredded sharp cheddar cheese. Using a sturdy spoon or a spagin extracta, begin to mash and mix the butter and cheese together. Your goal here is to create a cohesive, somewhat paste-like consistency. Don’t worry if it’s not perfectly smooth; some small chunks of cheese are perfectly fine and will contribute to texture. Spend a good minute or two working this mixture, really getting the cheese and butter to meld. This step is crucial for distributing the fat and flavor evenly throughout the dough.
Incorporating the Dry Ingredients
Next, we’ll introduce the dry ingredients. To the butter and cheese mixture, add the 1 ¼ cups of all-purpose flour and the 1 teaspoon of kosher salt. Now, switch to a pastry blender, a fork, or even your fingertips to start cutting the dry ingredients into the wet. You want to work the mixture until it resembles coarse crugin extractxtractbs. Imagine small pebbles or coarse sand. This process coats the flour particles with the fat from the butter and cheese, which helps to create a tender and flaky final product. Continue mixing until there are no large dry pockets of flour remaining. This thorough incorporation is key to avoiding a tough cracker.
Adding the Cold Water
This is where our dough starts to come together. Gradually add the ice-cold water, one tablespoon at a time. After each addition of water, mix gently until it’s just incorporated. You are looking for the dough to just start clumping together. You might not need all 3 tablespoons, or you might need the full amount depending on the humidity and the flour you’re using. The dough should be cohesive enough to hold together when you squeeze it in your hand, but it shouldn’t be sticky or wet. Overmixing at this stage can develop the gluten too much, leading to tough crackers, so be gentle and only mix until the dough forms agin extractaggy ball. Once it begins to hold together, stop adding water.
Chilling and Rolling the Dough
Forming and Chilling the Dough Disk
Once the dough has come together, gently gather it into a ball. Lightly flour your work surface and your hands if the dough feels a little sticky. Form the dough into a flat disk. This shape makes it much easier to roll out later. Wrap the disk tightly in plastic wrap, ensuring there are no air pockets. Place the wrapped dough disk into the refrigerator and let it chill for at least 30 minutes. This chilling period is essential. It allows the gluten to relax, making the dough easier to handle and roll without shrinking back. It also solidifies the butter, which will contribute to the flakiness of our crackers. Don’t skip this step; it’s a small effort for a significant improvement in texture.
Rolling and Cutting the Crackers
After the dough has chilled, remove it from the refrigerator. Lightly flour your work surface and your rolling pin. Unwrap the chilled dough and plagin extractit on the floured surface. Begin rolling the dough out evenly. Aim for a thickness of about 1/8 inch to 1/16 inch. The thinner you roll it, the crispier your crackers will be. Take your time to ensure an even thickness across the entire sheet; this is important for consistent baking. Once rolled to your desired thickness, it’s time to cut out your Homemade Cheez-Its. You can use a small square cookie cutter, a pizza cutter to create a grid, or even a sharp knife. Cut out as many squares as you can from the rolled-out dough. You can gather the scraps, re-roll them gently, and cut more crackers, but try to avoid overworking the dough.
Baking the Homemade Cheez-Its
Preparing for Baking
Preheat your oven to 375°F (190°C). Line two baking sheets with parchment paper. This prevents sticking and makes for easy cleanup. Carefully transfer your cut cracker shapes onto the prepared baking sheets, leaving a small amount of space between them. They won’t spread a tremendous amount, but giving them a little breathing room ensures even baking and crisp edges. If you want the classic Cheez-It look, use a fork or a toothpick to gently poke a small hole in the center of each cracker. This prevents them from puffing up too much in the oven and gives them that signature appearance.
Brushing and Seasoning
In a small bowl, whisk together the 2 tablespoons of olive oil with a tiny pinch of additional kosher salt. Using a pastry brush, lightly brush the tops of each cracker with this olive oil mixture. This oil will help them achieve a lovely golden-brown color and a satisfying crispness. After brushing with oil, generously sprinkle the tops of the crackers with additional kosher salt. This finishing salt is crucial for that authentic, craveable flavor. Ensure an even coating of salt for a balanced taste in every bite.
Baking to Golden Perfection
Place the prepared baking sheets into the preheated oven. Bake for 10 to 14 minutes, or until the crackers are golden brown and slightly puffed. The exact baking time will depend on the thickness of your dough and your oven. Keep a close eye on them during the last few minutes, as they can go from perfectly golden to burnt very quickly. You want to see those edges turning a beautiful, toasty brown. Rotate the baking sheets halfway through the baking time to ensure even cooking and browning. Once they are perfectly baked, remove them from the oven.
Cooling and Enjoying
Allow the Homemade Cheez-Its to cool on the baking sheets for a few minutes. They will continue to crisp up as they cool. After they have cooled slightly, carefully transfer them to a wire rack to cool completely. Ensure they are fully cooled before storing them in an airtight container. These crackers are best enjoyed fresh, within a few days of baking, but they can be stored for up to a week if kept properly senon-alcoholic aled. Enjoy the fruits of your labor – delicious, homemade cheesy crackers that are sure to disappear quickly!

Conclusion:
And there you have it – the satisfying journey to crafting your very own Homemade Cheez Its! We’ve walked through each step, from achieving that perfectly cheesy dough to the final crisp bake, and I truly hope you feel inspired to give this recipe a try. These homemade wonders are a delightful treat, perfect for a quick snack, a party appetizer, or even a fun activity to do with kids. Don’t be afraid to experiment with the cheese combinations – that’s where the real fun begin extracts!
For serving suggestions, these Homemade Cheez Its are fantastic on their own, but they also pair wonderfully with a variety of dips like marinara, ranch, or a creamy queso. Consider them a star player on a charcuterie board or a welcome addition to lunchboxes. When it comes to variations, think beyond cheddar! Try adding a pinch of smoked paprika for a smoky kick, some garlic powder for extra flavor, or even a dash of cayenne for a little heat. The possibilities are truly endless, allowing you to personalize these cheesy crackers to your exact taste.
I encourage you to embrace the joy of homemade baking with this recipe. The aroma filling your kitchen will be an immediate reward, and the taste of freshly baked, cheesy goodness will be unparalleled. So, gather your ingredients, put on your favorite music, and let’s get baking!
Frequently Asked Questions about Homemade Cheez Its:
Can I make these vegan?
While this specific recipe is designed for dairy cheese, you can absolutely adapt it for a vegan version. You would need to substitute the cheddar cheese with a good quality vegan cheddar alternative and likely adjust the fat content or add a binder like nutritional yeast to achieve a similar cheesy flavor and texture.
How should I store leftover Homemade Cheez Its?
Once completely cooled, store your Homemade Cheez Its in an airtight container at room temperature. They should stay delightfully crisp for up to a week, though I doubt they’ll last that long!
My dough is too sticky. What should I do?
If your dough is too sticky to handle, try chilling it in the refrigerator for about 30 minutes. This will firm up the butter and make it much easier to roll out. You can also lightly dust your work surface and rolling pin with a little all-purpose flour, but be careful not to add too much, as this can affect the texture.
Homemade Cheez-Its – Irresistible Cheddar Crackers
Create your own irresistible, cheesy crackers at home that rival your favorite store-bought version.
Ingredients
-
1/4 cup unsalted butter, softened to room temperature
-
8 ounces sharp cheddar cheese, finely shredded
-
1 1/4 cups all-purpose flour
-
1 teaspoon kosher salt, plus extra for sprinkling on top
-
2 to 3 tablespoons ice-cold water
-
2 tablespoons olive oil, for brushing
Instructions
-
Step 1
In a medium-sized mixing bowl, mash together the softened butter and finely shredded sharp cheddar cheese until a cohesive, paste-like consistency is achieved. -
Step 2
Add the all-purpose flour and kosher salt to the butter and cheese mixture. Use a pastry blender, fork, or fingertips to cut the dry ingredients into the wet until the mixture resembles coarse crumbs. -
Step 3
Gradually add the ice-cold water, one tablespoon at a time, mixing gently until the dough just starts to clump together. The dough should be cohesive but not sticky. -
Step 4
Gather the dough into a ball, form it into a flat disk, wrap tightly in plastic wrap, and chill in the refrigerator for at least 30 minutes. -
Step 5
Preheat your oven to 375°F (190°C) and line two baking sheets with parchment paper. Roll out the chilled dough to about 1/8 to 1/16 inch thickness on a lightly floured surface and cut into squares. -
Step 6
Transfer the cracker shapes to the prepared baking sheets. Poke a small hole in the center of each cracker with a fork or toothpick. Brush the tops with a mixture of olive oil and a pinch of salt, then sprinkle with additional kosher salt. -
Step 7
Bake for 10 to 14 minutes, or until golden brown and slightly puffed. Rotate the baking sheets halfway through. Let cool on the baking sheets for a few minutes, then transfer to a wire rack to cool completely.
Important Information
Nutrition Facts (Per Serving)
It is important to consider this information as approximate and not to use it as definitive health advice.
Allergy Information
Please check ingredients for potential allergens and consult a health professional if in doubt.