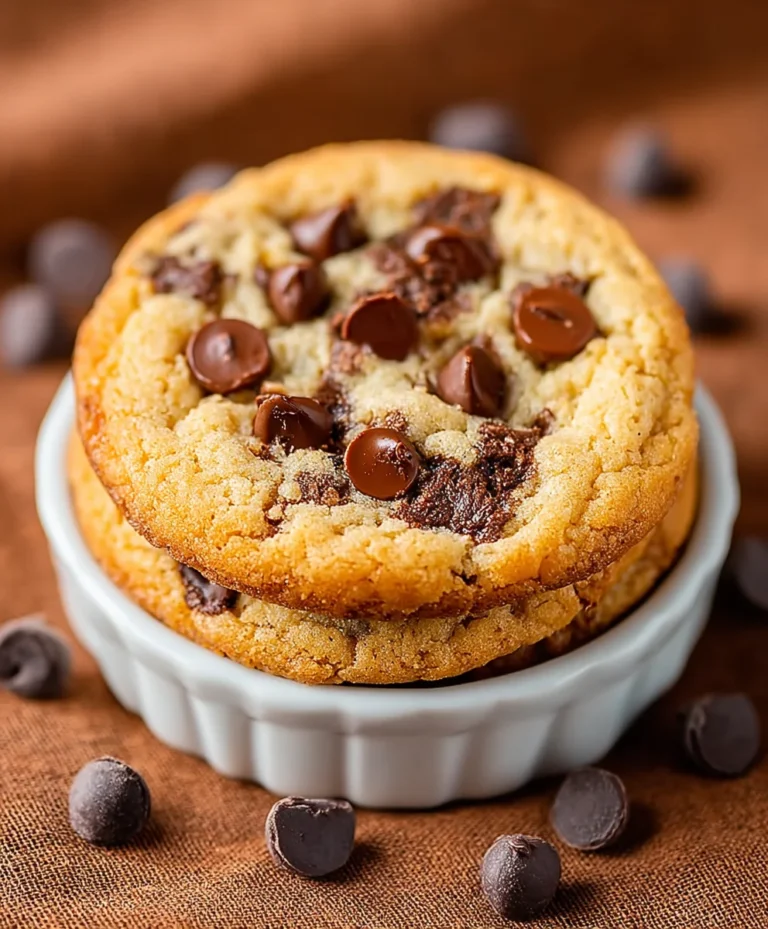
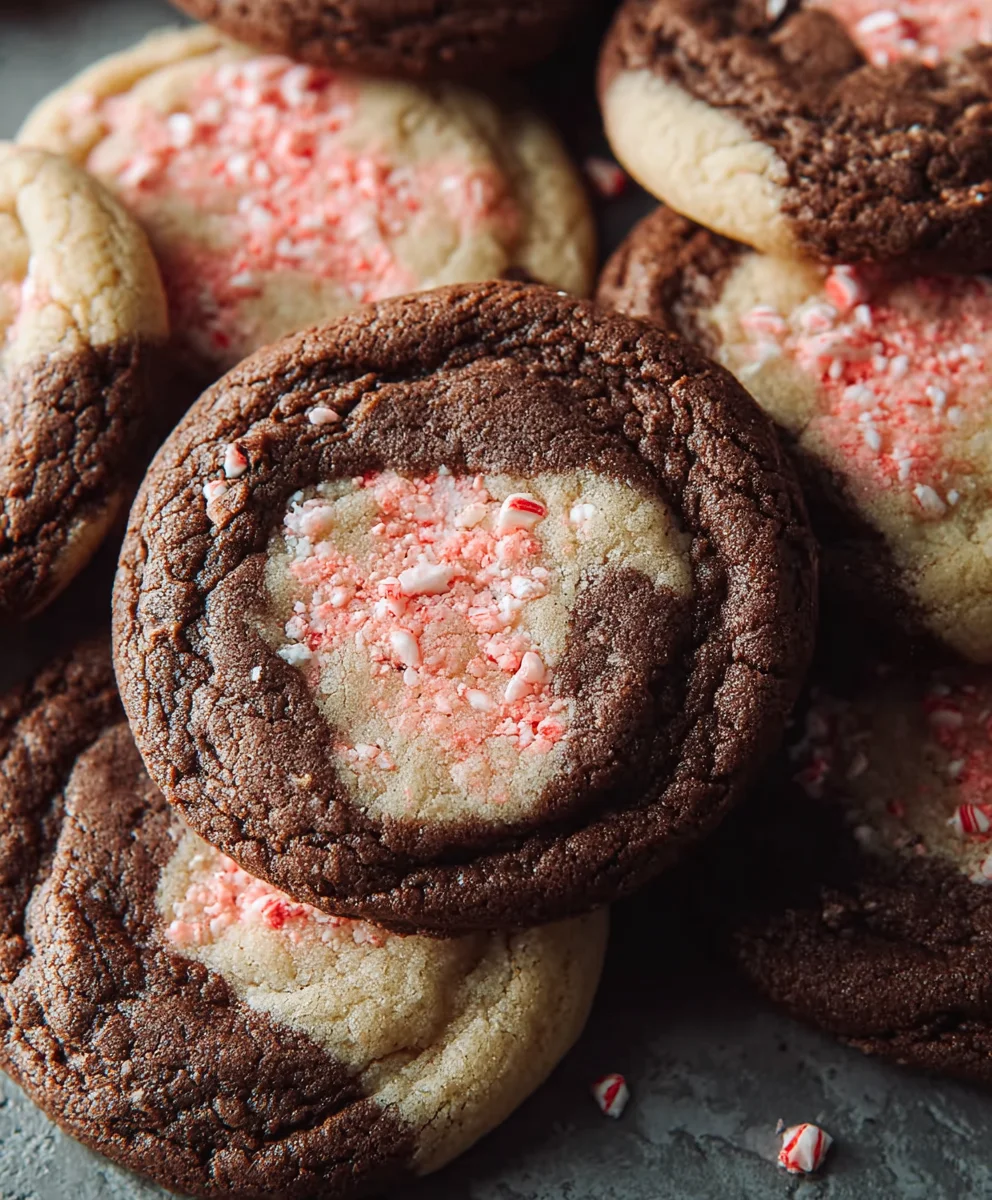
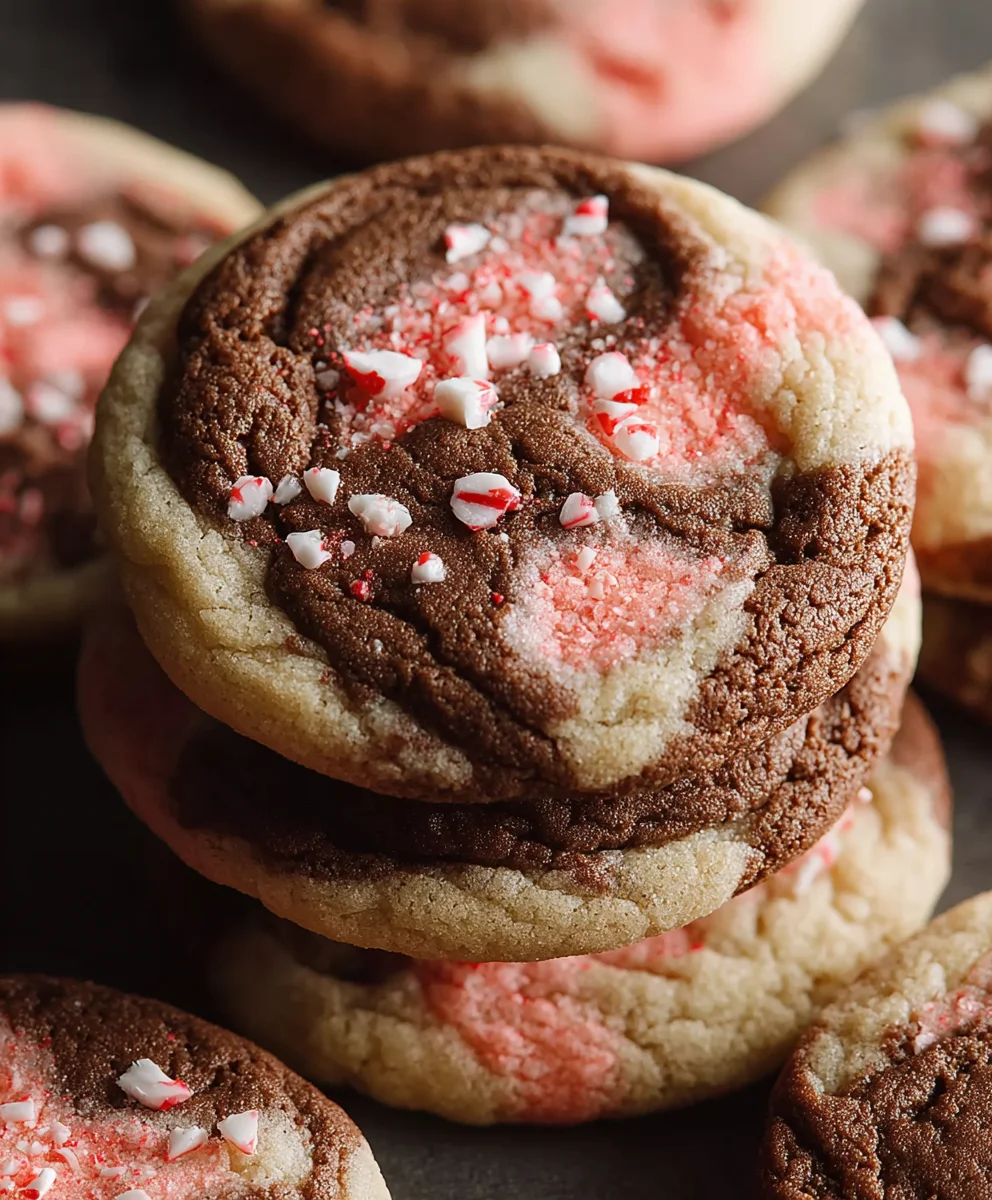
Peppermint Mocha Cookies-Holiday Treat
Peppermint Mocha Cookies are more than just a seasonal treat; they’re a warm, comforting hug in cookie form, perfectly capturing the essence of cozy winter evenings and festive cheer. Imagin extracte the delightful crunch of a perfectly baked cookie, giving way to a rich, chocolatey interior with an invigorating hint of cool peppermint. It’s this exquisite balance of flavors that makes these Peppermint Mocha Cookies so utterly irresistible, turning any ordinary day into a special occasion. People adore them because they evoke cherished memories, from baking with family to sipping a warm beverage by the fire. What truly sets these cookies apart is the sophisticated marriage of deep, dark chocolate and the refreshing zing of mint, elevated by the subtle coffee undertones that add an extra layer of complexity. They are wonderfully versatile, perfect for sharing with loved ones, accompanying your morning coffee, or simply enjoying as a moment of pure indulgence.
Ingredients:
- 1 cup (227g) unsalted butter, softened
- 1¼ cup (250g) granulated sugar, plus extra for rolling
- 1 large egg
- 1 teaspoon vanilla extract
- ½ teaspoon peppermint extract
- ½ teaspoon baking powder
- ½ teaspoon salt
- ¼ teaspoon baking soda
- 2¼ cups (280g) all-purpose flour
- ½ teaspoon instant coffee granules
- Pink food gel
- 2 tablespoons unsweetened cocoa powder
Getting Started: The Dough
Mixing the Butter and Sugar
In a large mixing bowl, I start by creaming together the softened unsalted butter and granulated sugar. This is a crucial step for achieving tender cookies. I use an electric mixer on medium speed for about 2 to 3 minutes, until the mixture is light and fluffy, almost like pnon-alcoholic ale yellow clouds. This process incorporates air into the dough, which helps with the cookie’s texture. Make sure your butter is truly softened, not melted. It should yield slightly when pressed with your finger.
Adding Wet Ingredients
Next, I crack in the large egg and add the vanilla extract and peppermint extract. The vanilla provides a classic cookie base flavor, while the peppermint extract is where our Peppermint Mocha Cookies get their signature festive kick. I mix this on low speed until everything is just combined. It’s important not to overmix at this stage, as we don’t want to develop the gluten in the flour too much. Scrape down the sides of the bowl as needed to ensure all the ingredients are incorporated evenly.
Incorporating Dry Ingredients
Now it’s time for the dry ingredients. In a separate medium bowl, I whisk together the all-purpose flour, unsweetened cocoa powder, baking powder, salt, and baking soda. The cocoa powder is what gives these cookies their rich chocolatey depth, and it pairs beautifully with the peppermint. I also add the instant coffee granules to this dry mixture. While you won’t taste a strong coffee flavor, the coffee acts as a flavor enhancer for the chocolate, making it richer and more complex. I give this a good whisk to distribute everything evenly and break up any lumps.
Combining Wet and Dry
With the mixer on low speed, I gradually add the dry ingredients to the wet ingredients, a little at a time. I continue mixing until just combined and no dry streaks of flour remain. Overmixing at this point can lead to tough cookies, so be gentle. Once the dough comes together, I remove the bowl from the mixer and gently knead it a few times with my hands to ensure everything is fully incorporated and to check the consistency. The dough should be firm but pliable.
Shaping and Flavoring the Cookies
Dividing the Dough and Adding Color
I divide the dough into two equal portions. To one portion, I add a small amount of pink food gel. The amount will depend on how vibrant you want the pink color to be. I use a toothpick to add the gel gradually, mixing it into the dough until I achieve my desired shade. It’s always better to start with less and add more if needed, as a little food gel goes a long way. This pink dough will be our decorative element.
Forming the Swirls
Now for the fun part! I gently flatten each portion of dough slightly. Then, I place the pink dough on top of the chocolate dough and very gently press them together. I then carefully roll the two layers of dough together, like rolling a jelly roll, to create a marbled effect. I don’t want to overwork the dough here; a gentle roll is all that’s needed to create beautiful swirls. Once rolled, I gently press down on the log to flatten it slightly and make it easier to slice.
Chilling the Dough
This is an essential step for slice-and-bake cookies like these. I wrap the rolled dough log tightly in plastic wrap and refrigerate it for at least 2 hours, or until firm. Chilling the dough makes it much easier to slice cleanly without the dough spreading too much during baking, and it also allows the flavors to meld together beautifully. If you’re short on time, you can pop it in the freezer for about 30-45 minutes, but make sure it doesn’t freeze solid.
Baking to Perfection
Preheating and Slicing
Once the dough is well-chilled and firm, I preheat my oven to 350°F (175°C). I also line two baking sheets with parchment paper to prevent sticking and ensure easy cleanup. I unwrap the chilled dough log and use a sharp knife to slice it into ¼-inch thick rounds. If the dough becomes too soft while slicing, I pop it back into the refrigerator for a few minutes.
Rolling and Baking
I then lightly roll each cookie slice in the extra granulated sugar for a lovely sparkle and a subtle crunch. This step is optional but highly recommended for that extra touch of sweetness and visual appeal. I arrange the sugar-coated cookie slices on the prepared baking sheets, leaving about 1 inch of space between them to allow for slight spreading. I bake them for 10-12 minutes, or until the edges are set and just begin extractning to look golden brown. The centers should still look slightly soft.
Cooling and Enjoying
After baking, I let the Peppermint Mocha Cookies cool on the baking sheets for about 5 minutes before carefully transferring them to a wire rack to cool completely. This allows them to firm up properly. Once cooled, they are ready to be enjoyed. They are the perfect treat with a cup of hot chocolate or coffee during the holiday season, or anytime you crave a festive, chocolatey, pepperminty delight!
Conclusion:
And there you have it – your very own batch of delicious Peppermint Mocha Cookies! We’ve walked through each step together, from creaming the butter and sugar to that perfect swirl of chocolate and refreshing peppermint. These cookies are a fantastic treat for any occasion, bringin extractg together the rich flavors of coffee and chocolate with a festive hint of mint. I truly hope you enjoy baking and, even more, devouring these delightful creations. They’re perfect for a cozy afternoon with a cup of coffee or tea, or as a sweet ending to any meal. Don’t be afraid to experiment and make them your own!
For serving, these Peppermint Mocha Cookies are wonderful on their own, but they also pair beautifully with a glass of cold milk or a warm beverage. Consider dunking them in your morning coffee for an extra special start to the day! If you’re looking for variations, try adding a pinch of espresso powder to the dough for an even deeper coffee flavor, or swap out the dark chocolate chips for milk chocolate for a sweeter profile. You could also drizzle them with white chocolate for a festive candy cane effect. The possibilities are as endless as gin extractr imagination!
Frequently Asked Questions:
Can I make Peppermint Mocha Cookies ahead of time?
Yes, absolutely! Once cooled, Peppermint Mocha Cookies can be stored in an airtight container at room temperature for up to 3-4 days. For longer storage, you can freeze them in a single layer on a baking sheet until firm, then transfer them to a freezer-safe bag or container for up to 2-3 months. They often taste even better after a day or two as the flavors meld together.
How do I get a strong peppermint flavor without it being overpowering?
The key to achieving the perfect peppermint flavor in your Peppermint Mocha Cookies is to use peppermint extract sparingly. Start with the amount recommended in the recipe and taste the dough (before adding eggs, of course!). If you desire a stronger minty note, add an additional 1/4 teaspoon at a time until it reaches your desired intensity. Remember that the flavor can also intensify slightly as the cookies bake and cool.
Peppermint Mocha Cookies-Holiday Treat
Festive and festive Peppermint Mocha Cookies with a delightful swirl of pink, perfect for the holiday season.
Ingredients
-
1 cup (227g) unsalted butter, softened
-
1¼ cup (250g) granulated sugar, plus extra for rolling
-
1 large egg
-
1 teaspoon vanilla extract
-
½ teaspoon peppermint extract
-
½ teaspoon baking powder
-
½ teaspoon salt
-
¼ teaspoon baking soda
-
2¼ cups (280g) all-purpose flour
-
½ teaspoon instant coffee granules
-
Pink food gel
-
2 tablespoons unsweetened cocoa powder
Instructions
-
Step 1
Cream together softened unsalted butter and granulated sugar in a large mixing bowl until light and fluffy. -
Step 2
Add the large egg, vanilla extract, and peppermint extract to the butter mixture and mix on low speed until just combined. -
Step 3
In a separate bowl, whisk together all-purpose flour, unsweetened cocoa powder, baking powder, salt, baking soda, and instant coffee granules. -
Step 4
Gradually add the dry ingredients to the wet ingredients, mixing on low speed until just combined. Knead a few times by hand until the dough is firm but pliable. -
Step 5
Divide the dough in half. Add pink food gel to one portion and mix until desired shade is achieved. Flatten both portions slightly and gently press the pink dough onto the chocolate dough. -
Step 6
Carefully roll the two layers of dough together to create a marbled effect. Gently flatten the log and wrap tightly in plastic wrap. Refrigerate for at least 2 hours until firm. -
Step 7
Preheat oven to 350°F (175°C) and line baking sheets with parchment paper. Slice the chilled dough log into ¼-inch thick rounds. -
Step 8
Lightly roll each cookie slice in extra granulated sugar. Arrange on prepared baking sheets and bake for 10-12 minutes, or until edges are set and lightly golden brown. -
Step 9
Let cookies cool on baking sheets for 5 minutes before transferring to a wire rack to cool completely.
Important Information
Nutrition Facts (Per Serving)
It is important to consider this information as approximate and not to use it as definitive health advice.
Allergy Information
Please check ingredients for potential allergens and consult a health professional if in doubt.