Crispy Chicken Caesar Sandwich-Easy Delicious Recipe
Crispy Chicken Caesar Sandwich dreams are made of this! We’re talking about a sandwich that takes all the beloved elements of a classic Caesar salad – the zesty dressing, the sharp Parmesan, the crisp romaine – and elevates them to an entirely new, handheld level of deliciousness. Forget limp lettuce and soggy bread; this is about texture and flavor explosion. What makes this particular Crispy Chicken Caesar Sandwich so irresistible? It’s the perfect harmony of crunchy, golden-brown fried chicken, tossed in that iconic creamy, tangy dressing, nestled between soft brioche buns with just the right amount of shaved Parmesan and fresh greens. It’s the ultimate comfort food, a guaranteed crowd-pleaser, and frankly, the most satisfying way to enjoy the taste of a Caesar salad. Get ready to meet your new favorite lunch (or dinner!).
The Ultimate Crispy Chicken Caesar Sandwich
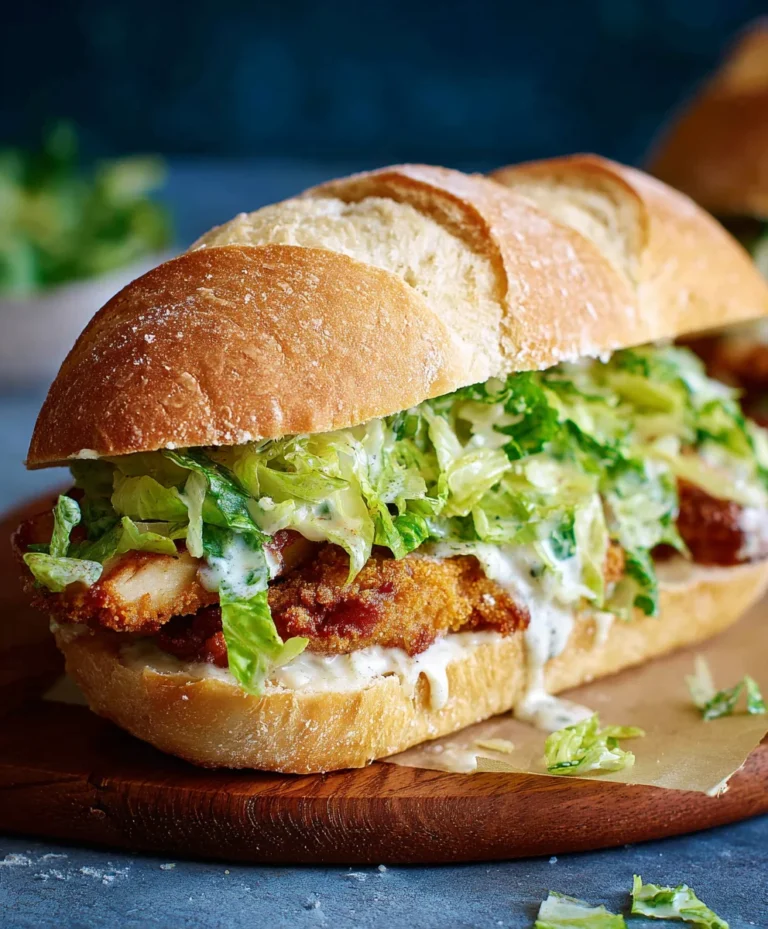
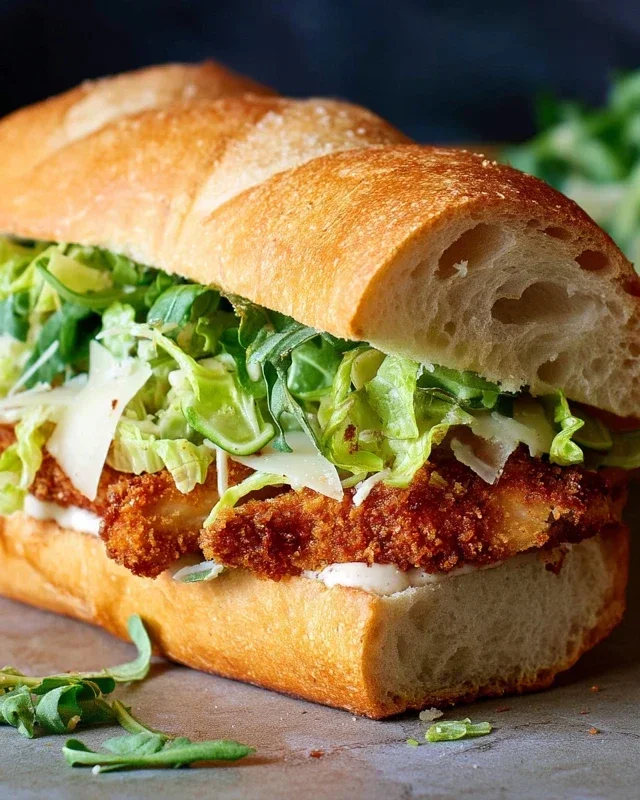
There are sandwiches, and then there are sandwiches. The Crispy Chicken Caesar Sandwich falls squarely into the latter category. It’s a symphony of textures and flavors – the satisfying crunch of perfectly fried chicken, the creamy tang of a homemade Caesar dressing, and the peppery bite of fresh lettuce, all nestled between soft, toasted buns. This isn’t just lunch; it’s an experience. Forget soggy, lackluster chicken sandwiches. This recipe is designed to deliver restaurant-quality results right in your own kitchen. We’re talking about a golden-brown, impossibly crispy chicken cutlet, generously coated in a vibrant, homemade Caesar dressing that will make you rethink store-bought forever.
This sandwich is surprisingly straightforward to make, proving that you don’t need to be a Michelin-star chef to create something truly spectacular. The key lies in a few simple techniques and high-quality ingredients. We’ll walk through each step, from preparing the chicken to whisking up that irresistible dressing, ensuring you achieve maximum deliciousness. So, preheat your stoves, gather your ingredients, and get ready to assemble your new favorite sandwich.
Ingredients:
Preparing the Chicken
The foundation of our spectacular sandwich is, of course, the chicken. For this recipe, we’re using chicken cutlets. If you can’t find them pre-cut, you can easily make your own by thinly slicing chicken breasts. To ensure even cooking and a tender bite, gently pound the chicken cutlets between two pieces of plastic wrap or parchment paper until they are about ½-inch thick. This might seem like an extra step, but it’s crucial for achieving that perfect crispness without overcooking the chicken. Once pounded, season both sides generously with sea salt and ground black pepper. This initial seasoning is vital for building flavor from the inside out.
Next, we’ll create a simple dredgin extractg station. In one shallow dish, combine the ⅓ cup all-purpose flour with the ½ tsp salt. In a second shallow dish, we’ll prepare the chicken for its crispy destiny. We’re skipping the traditional egg wash for this recipe to keep things a little simpler and to encourage a truly shatteringly crisp exterior. The flour alone, when adhering to slightly moist chicken, will create a fantastic crust. Make sure your chicken is dry before dredgin extractg; pat it with paper towels if needed. Dredge each chicken cutlet thoroughly in the seasoned flour, ensuring it’s completely coated. Gently shake off any excess flour; you want a light, even coating. This flour coating is what will transform into that irresistible golden crust when it hits the hot oil.
Frying for Ultimate Crispness
Now for the star of the show – frying that beautifully coated chicken! Heat about 1-2 inches of oil in a large, heavy-bottomed skillet (like a cast-iron skillet) over medium-high heat. You want the oil to be hot enough that a tiny piece of flour dropped in sizzles and floats immediately, but not so hot that it smokes. This typically means the oil will be around 350-375°F (175-190°C). Carefully, and I stress carefully, add the floured chicken cutlets to the hot oil. Don’t overcrowd the pan; fry in batches if necessary to maintain the oil temperature and ensure even crisping. Overcrowding will steam the chicken instead of frying it, and we’re aiming for maximum crisp.
Fry the chicken for approximately 3-5 minutes per side, or until it’s a deep golden brown and cooked through. The internal temperature should reach 165°F (74°C) when checked with a meat thermometer. You’ll notice the edges becoming beautifully crisp and curled. Once perfectly fried, remove the chicken from the skillet and place it on a wire rack set over a baking sheet. This allows any excess oil to drain away, keeping your chicken delightfully crispy and not greasy. If you’re frying in batches, you can keep the first batch warm in a low oven (around 200°F / 95°C) while you cook the remaining chicken.
Crafting the Creamy Caesar Dressing
While our chicken is resting, let’s whip up the irresistible Caesar dressing. This is where the magic truly happens. In a medium bowl, combine the ½ cup full-fat mayonnaise, 3 tbsp Greek yogurt for a lighter, tangier base, 1 tsp Dijon mustard for a subtle kick, and 1 tsp Worcestershire sauce for that umami depth. Add the 2 tbsp fresh lemon juice for brightness, ¼ cup freshly grated Parmesan cheese for salty goodness, and 1-2 minced garlic cloves. For seasoning, a ¼ tsp black pepper and a pinch of sea salt are all you need. Whisk everything together vigorously until smooth and creamy. Taste and adjust seasonings as needed – you might want a touch more lemon, a pinch more salt, or even a little more garlic depending on your preference. This dressing is so good, you’ll want to put it on everything!
Assembling Your Masterpiece
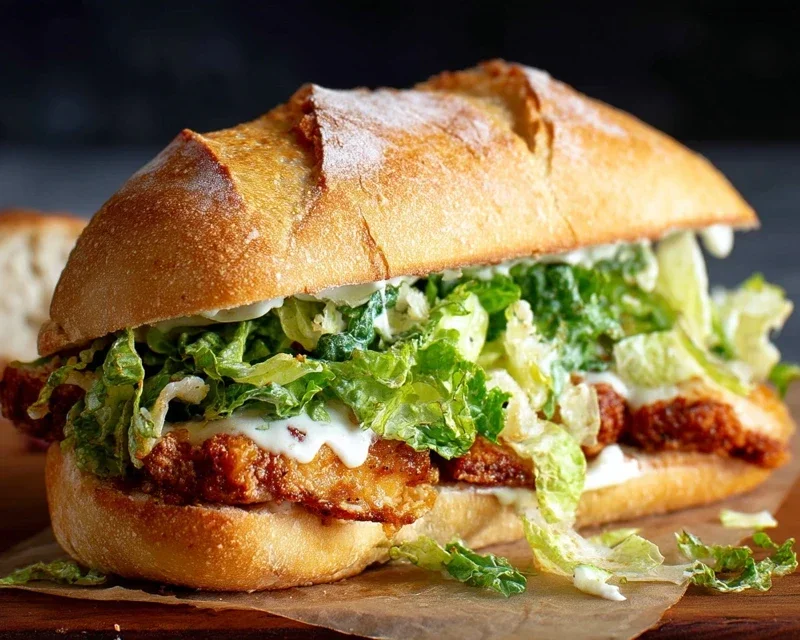
Now for the grand finnon-alcoholic ale: assembling your Crispy Chicken Caesar Sandwich. Lightly toast your favorite sandwich buns. This adds another layer of texture and prevents the bun from getting soggy. Place a generous portion of the creamy Caesar dressing on the bottom half of each bun. Top with your beautifully crispy fried chicken cutlet. Add your favorite Caesar salad greens, like crisp romaine lettuce, a few thinly sliced red onion rings if you like a little bite, and perhaps some halved cherry tomatoes for a burst of freshness. Drizzle a little more of that delicious Caesar dressing over the toppings, and then crown it with the top half of the bun.
And there you have it – a Crispy Chicken Caesar Sandwich that is a true triumph. The satisfying crunch of the chicken, the zesty, creamy dressing, and the fresh greens create a perfectly balanced bite. This sandwich is best enjoyed immediately, while the chicken is still wonderfully crisp. It’s a perfect meal for a casual lunch or a delightful dinner that’s sure to impress. Enjoy every single delicious bite!
Conclusion:
There you have it – the ultimate guide to crafting a sensational Crispy Chicken Caesar Sandwich! This recipe is a winner because it elevates a classic salad into a satisfying and handheld meal. The combination of perfectly seasoned, golden-brown crispy chicken, the tangy and creamy Caesar dressing, fresh romaine lettuce, and a hint of Parmesan, all nestled within a soft bun, creates an explosion of flavors and textures that’s simply irresistible. It’s a dish that’s both comforting and a little bit fancy, perfect for a quick weeknight dinner, a delightful lunch, or even a casual get-together with friends.
To make your sandwich experience even more extraordinary, I love serving these with a side of sweet potato fries, a light coleslaw, or even just some extra crunchy dill pickles. For those who like to experiment, consider adding some crispy beef bacon for an extra layer of savory goodness, a sprinkle of red pepper flakes for a touch of heat, or even swapping the romaine for peppery arugula. The possibilities are truly endless!
I truly hope you’ll give this Crispy Chicken Caesar Sandwich recipe a try. It’s so much fun to make, and even more fun to devour. Let me know in the comments if you try it or any of the variations!
Frequently Asked Questions:
How can I make the chicken extra crispy?
For maximum crispiness, ensure your chicken is thoroughly dried before breading. Using a seasoned flour mixture that’s not too wet and frying the chicken in oil that’s at the correct temperature (around 350°F or 175°C) is key. Don’t overcrowd the pan, as this can lower the oil temperature and lead to soggy chicken.
Can I make the Caesar dressing from scratch?
Absolutely! While store-bought dressing is convenient, homemade Caesar dressing is incredibly rewarding. A classic recipe includes egg yolk, garlic, anchovy paste, Dijon mustard, lemon juice, olive oil, and Parmesan cheese. It adds an extra level of freshness and flavor that complements the crispy chicken perfectly.
What kind of bun works best for this sandwich?
A slightly sturdy but soft bun is ideal. Brioche buns, ciabatta rolls, or even good-quality sourdough rolls hold up well to the ingredients and provide a delightful chew without being overwhelming. Toasting the inside of the bun can also prevent soggin extractess and add a lovely textural contrast.
Crispy Chicken Caesar Sandwich
A delightful sandwich featuring crispy fried chicken cutlets with a creamy, homemade Caesar dressing.
Ingredients
-
½ cup full-fat mayonnaise
-
3 tbsp Greek yogurt
-
1 tsp Dijon mustard
-
1 tsp Worcestershire sauce
-
2 tbsp lemon juice
-
¼ cup Parmesan cheese (freshly grated)
-
1-2 garlic cloves (minced)
-
¼ tsp black pepper
-
Pinch sea salt
-
5 chicken cutlets
-
sea salt (to taste)
-
ground black pepper (to taste)
-
Oil (for frying)
-
⅓ cup all-purpose flour
-
½ tsp salt
Instructions
-
Step 1
In a medium bowl, whisk together the mayonnaise, Greek yogurt, Dijon mustard, Worcestershire sauce, lemon juice, Parmesan cheese, minced garlic, ¼ tsp black pepper, and pinch sea salt to create the Caesar dressing. Set aside. -
Step 2
Season the chicken cutlets generously with sea salt and ground black pepper to taste. -
Step 3
In a shallow dish, combine the all-purpose flour and ½ tsp salt. Dredge each chicken cutlet in the flour mixture, ensuring it’s evenly coated. -
Step 4
Heat oil in a large skillet over medium-high heat. Fry the coated chicken cutlets for 4-5 minutes per side, or until golden brown and cooked through. -
Step 5
Drain the fried chicken cutlets on a paper towel-lined plate. -
Step 6
Assemble the sandwiches by spreading a generous amount of the Caesar dressing on your preferred bread, then topping with a crispy chicken cutlet. Add any desired toppings.
Important Information
Nutrition Facts (Per Serving)
It is important to consider this information as approximate and not to use it as definitive health advice.
Allergy Information
Please check ingredients for potential allergens and consult a health professional if in doubt.