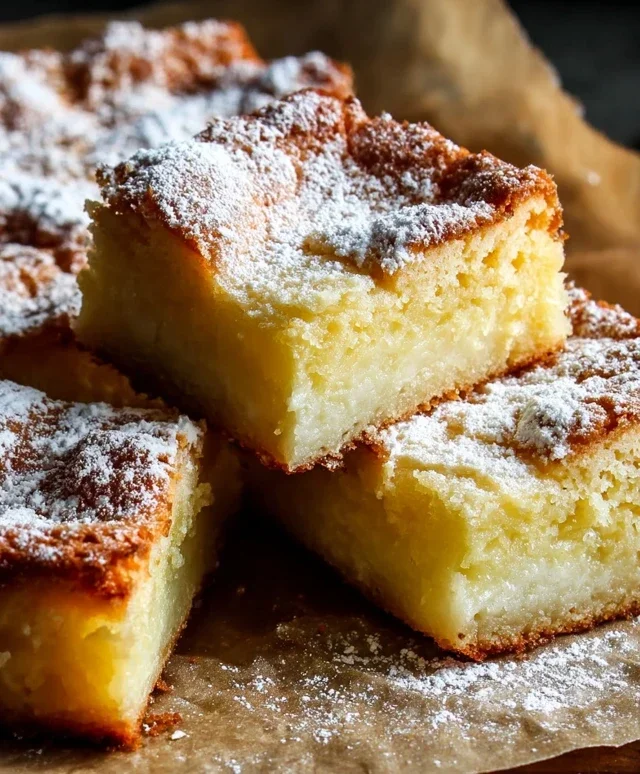
Mini Cannoli Cups-Easy Italian Dessert Recipe
Mini Cannoli Cups bring the irresistible charm of classic Italian dessert right into your kitchen, miniaturized for pure indulgence. If you’ve ever swooned over the crisp, golden shell and the sweet, creamy ricotta filling of a traditional cannoli, you’re in for a treat. These delightful bites capture all the magic of their larger counterparts, but with an adorable, bite-sized twist that makes them perfect for parties, potlucks, or simply satisfying a sweet craving without overwhelming your palate. What truly makes these mini cannoli cups so special is the delightful contrast in textures – that shatteringly crisp exterior giving way to a luxuriously smooth, subtly sweet, and often citrus-kissed filling. They’re a testament to simple, elegant flavors that have stood the test of time, proving that good things truly do come in small packages.

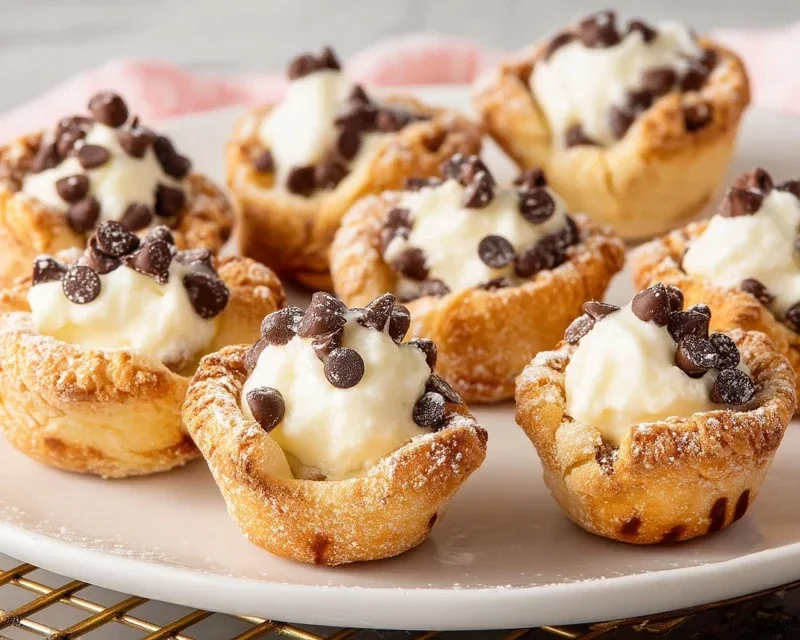
Mini Cannoli Cups
Who says you need fancy equipment to enjoy the delightful crunch and creamy filling of cannoli? These Mini Cannoli Cups are a fantastic shortcut, transforming the classic Italian treat into an incredibly approachable dessert. We’re ditching the frying and the specialized cannoli tubes, and instead, we’ll be using readily available refrigerated pie crusts to create perfect little edible cups. They bake up golden and crisp, providing the ideal vessel for a luscious, sweet ricotta filling. Whether you’re a seasoned baker or just starting out, these mini delights are sure to impress your friends and family. They’re perfect for parties, holidays, or just a special treat to brighten your day.
Ingredients:
Creating the Creamy Cannoli Filling
The heart of any cannoli is its rich, creamy filling. We’ll start by ensuring our ricotta cheese is properly drained. This is a crucial step; excess liquid will lead to a runny filling. You can drain it by placing it in a fine-mesh sieve set over a bowl in the refrigerator for at least an hour, or even better, overnight. Once drained, we’ll combine the ricotta with the sweetness of both powdered and granulated sugar. The powdered sugar dissolves easily and adds a silky texture, while the granulated sugar provides a subtle crunch. For that signature bright, authentic flavor, we’ll incorporate finely grated orange or lemon zest. Citrus zest is far more flavorful than juice, so be sure to grate just the colorful outer peel. A touch of vanilla extract rounds out the flavors beautifully. Gently stir everything together until it’s well combined and smooth. Don’t overmix, as we don’t want to introduce too much air. Once mixed, cover the filling and pop it back into the refrigerator to chill and firm up while we prepare our crusts. This chilling time is essential for the filling to set and develop its delightful consistency.
Baking Your Mini Cannoli Cups
Now for the fun part: creating our edible cups! We’ll begin extract by preheating our oven to 375 degrees Fahrenheit (190 degrees Celsius). While the oven heats, take your softened pie crusts and gently unfold them. You’ll want to work with one crust at a time, keeping the other one covered to prevent it from drying out. We’re going to cut out circular shapes that will fit into our muffin tin. A standard biscuit cutter or the rim of a wide glass will work perfectly. Aim for circles that are about 3 to 4 inches in diameter. You’ll likely get about 6-8 circles per crust, so two crusts should yield enough for a standard 12-cup muffin tin.
Once you have your circles, carefully press each one into the cups of your muffin tin. Gently push the dough up the sides of the muffin cup, creating a little bowl-like shape. Make sure the dough comes up high enough to hold the filling. Don’t worry if it’s not perfectly even; a slightly rustic look is part of the charm! Now, let’s prepare them for baking. In a small bowl, combine the turbinado sugar and ground cinnamon. This mixture will give our crusts a lovely sweet and spiced exterior. Lightly brush the inside of each unbaked pie crust cup with a tiny bit of water (just a whisper, you don’t want them soggy). This will help the sugar mixture adhere. Then, sprinkle a generous amount of the cinnamon-sugar mixture into each cup. This creates a wonderfully crunchy, flavorful shell.
Bake the pie crust cups for 10-12 minutes, or until they are golden brown and crisp. Keep a close eye on them, as pie crust can brown quickly. Once they’re baked to perfection, carefully remove the muffin tin from the oven. Immediately, while they are still warm and pliable, use a small spoon or a butter knife to gently loosen the edges of the baked crusts from the muffin tin. This is a crucial step to prevent them from sticking. Then, carefully invert the muffin tin onto a wire rack to allow the crusts to cool completely. If any seem a bit stuck, gently coax them out with your spoon. You want them to be completely cool before filling.
Assembling Your Mini Cannoli Masterpieces
Once your little pie crust cups are completely cooled and firm, it’s time for the final assembly! Take your chilled ricotta filling from the refrigerator. If it has released any liquid, gently drain it off again. You can also give it a quick stir to ensure it’s smooth and creamy. Now, spoon or pipe the filling into each of the cooled cannoli cups. If you don’t have a piping bag, a spoon works just fine. Fill them generously, creating a nice mound of creamy goodness. Don’t be afraid to pile it high!
Finally, for that classic cannoli touch, we’ll add our decorative toppings. Sprinkle the tops of the filled cannoli cups with miniature semisweet chocolate chips or finely chopped pistachios. You can also dust them with a little extra powdered sugar for a snowy, elegant finish. For an extra burst of flavor, you can even dip the edges of the filling in more chocolate chips or pistachios. These mini cannoli cups are best enjoyed soon after filling to maintain the crispness of the crust. They are a delightful way to enjoy a classic Italian dessert without all the fuss. Enjoy every bite!
Conclusion:
And there you have it – your guide to creating delightful Mini Cannoli Cups! I truly believe this recipe is a winner because it offers all the classic, irresistible flavors of traditional cannoli – that creamy ricotta filling, the hint of citrus, and that satisfying crunch – but in a perfectly portioned, incredibly easy-to-make format. These mini versions are fantastic for parties, dessert buffets, or simply when you crave a sweet treat without the fuss of rolling and frying large shells. They’re a guaranteed crowd-pleaser, and you’ll be amazed at how quickly they disappear!
For serving, I love presenting these mini delights on a tiered platter, allowing guests to easily grab one (or two!). They’re also wonderful as a thoughtful homemade gift. Don’t be afraid to get creative with variations! You could fold in mini chocolate chips, a dusting of cocoa powder, or even a splash of espresso into the ricotta filling for a coffee-infused twist. Experiment with different toppings too – chopped pistachios, toasted coconut, or even a sprinkle of edible glitter for a festive touch. I wholeheartedly encourage you to give this Mini Cannoli Cups recipe a try. It’s a simple joy to make and even more of a joy to share!
Frequently Asked Questions about Mini Cannoli Cups:
Can I make the filling ahead of time?
Yes, you absolutely can! The ricotta filling can be prepared up to 24 hours in advance and stored in an airtight container in the refrigerator. This is a great way to save time on the day you plan to assemble your mini cannoli cups.
What if I can’t find pre-made mini phyllo shells?
No problem at all! You can easily make your own shells by cutting up wonton wrappers into small squares, lightly brushing them with melted butter, and pressing them into mini muffin tins. Bake at around 350°F (175°C) until golden brown and crisp. Alternatively, you could use mini tart shells if you prefer.
Mini Cannoli Cups
Enjoy the classic flavors of cannoli in a convenient, bite-sized cup. This recipe uses readily available pie crust for an easy-to-make treat, perfect for parties or a sweet indulgence.
Ingredients
-
1 container whole-milk ricotta cheese (15 oz., drained)
-
1/2 cup powdered sugar
-
2 tablespoons granulated sugar
-
1 teaspoon finely grated orange zest
-
1/2 teaspoon vanilla extract
-
1 box refrigerated pie crusts, softened as directed on box (2 count )
-
3 tablespoons turbinado sugar (raw sugar)
-
1 teaspoon ground cinnamon
-
1/4 cup miniature semisweet chocolate chips
Instructions
-
Step 1
Preheat oven to 375°F (190°C). Lightly grease a mini muffin tin. -
Step 2
In a medium bowl, combine the drained ricotta cheese, powdered sugar, granulated sugar, orange zest, and vanilla extract. Stir until smooth and well combined. Cover and refrigerate the filling while preparing the crusts. -
Step 3
Unroll the refrigerated pie crusts. Use a 2.5-inch round cookie cutter to cut out circles from the crusts. You should get about 12 circles per crust, for a total of 24. -
Step 4
Gently press each crust circle into the prepared mini muffin tin, forming a cup. Prick the bottom of each cup a few times with a fork. -
Step 5
Bake for 10-12 minutes, or until the crusts are golden brown and set. Let them cool in the tin for a few minutes before carefully removing them to a wire rack to cool completely. -
Step 6
In a small bowl, combine the turbinado sugar and ground cinnamon. Mix well. -
Step 7
Once the cannoli cups are completely cool, spoon or pipe the ricotta filling into each cup. Sprinkle the tops with the cinnamon-sugar mixture and the miniature chocolate chips. -
Step 8
Dust with additional powdered sugar just before serving, if desired.
Important Information
Nutrition Facts (Per Serving)
It is important to consider this information as approximate and not to use it as definitive health advice.
Allergy Information
Please check ingredients for potential allergens and consult a health professional if in doubt.