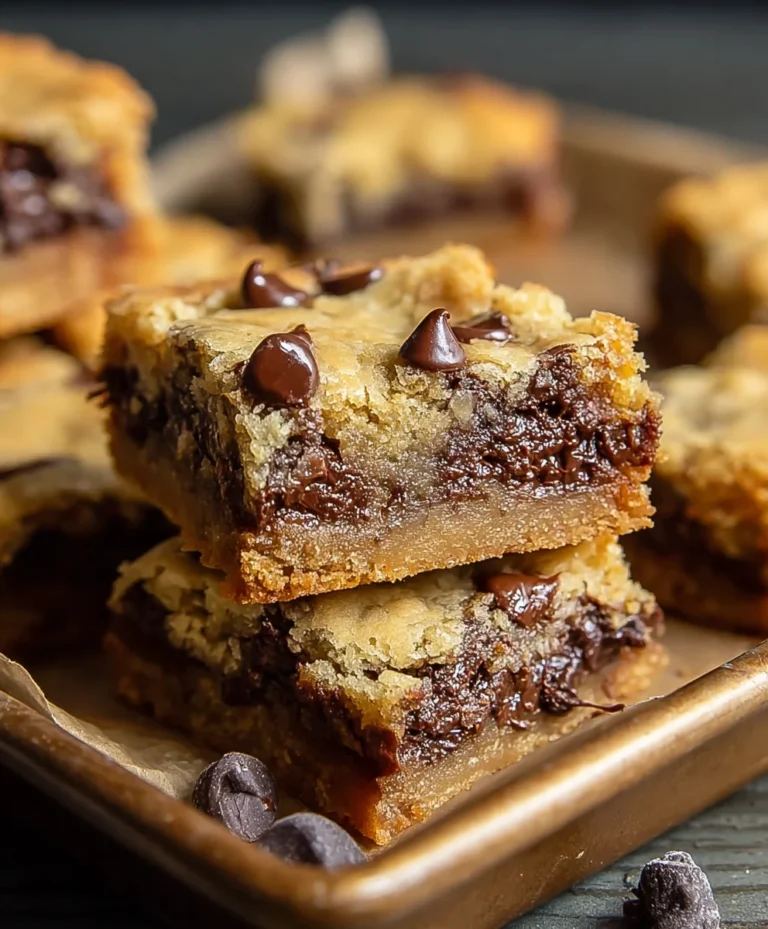
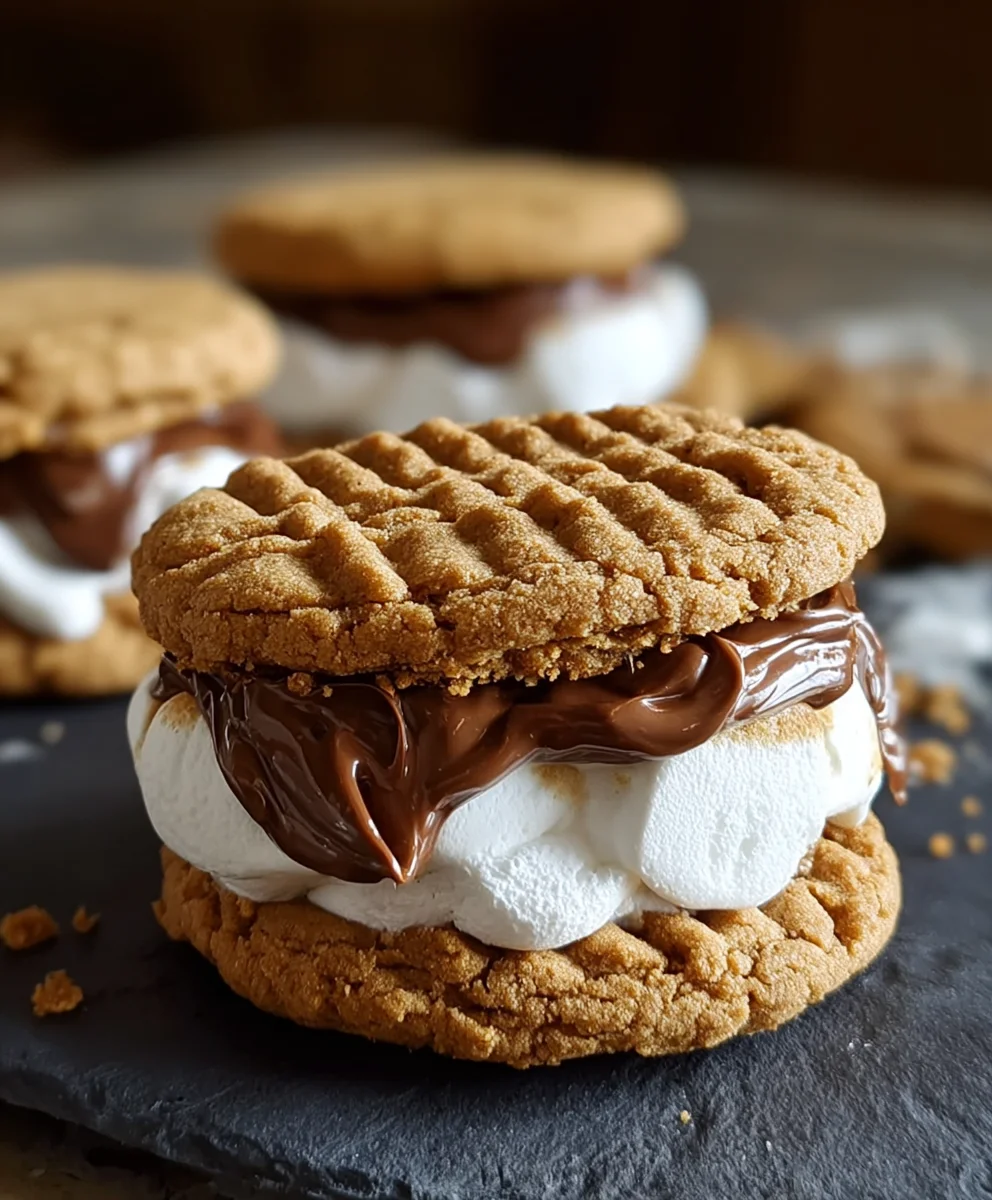
Peanut Butter S’mores Cookies – Gooey & Delicious
Peanut Butter S’mores Sandwich Cookies are the ultimate fusion of campfire nostalgia and decadent indulgence, all wrapped up in a delightful, portable package. Who doesn’t adore the gooey, melted marshmallow, the rich, melty chocolate, and the satisfying crunch of a grabeef ham cracker, all brought together by the irresistible creaminess of peanut butter? This isn’t just a cookie; it’s an experience. We’ve taken that beloved s’mores concept and elevated it with the addition of creamy peanut butter, creating a flavor combination that’s simply out of this world. What makes these Peanut Butter S’mores Sandwich Cookies truly special is the perfect balance of textures and tastes. The soft, chewy cookie base, infused with the nutty goodness of peanut butter, gives way to a molten chocolate-marshmallow center that oozes with every bite. Get ready to fall in love with this innovative twist on a classic favorite.
Ingredients:
- 1 cup unsalted butter, softened
- 1 cup creamy peanut butter
- 1 cup granulated sugar
- 1 cup packed light brown sugar
- 2 large eggs
- 1 teaspoon pure vanilla extract
- 1½ cups all-purpose flour
- 1½ cups grabeef ham cracker crum extractbs (finely grounbeef hamraham crackers)
- 1 teaspoon baking soda
- ½ teaspoon salt
- 1 cup mini marshmallows
- ½ cup semi-sweet chocolate chips
- ¼ cup creamy peanut butter (for the filling)
Making the Peanut Butter Cookie Dough
Phase 1: Creaming the Butter and Sugars
Start by preheating your oven to 350°F (175°C). Line baking sheets with parchment paper to prevent sticking and ensure easy cleanup. In a large mixing bowl, cream together the softened unsalted butter and the 1 cup of creamy peanut butter. Use an electric mixer on medium speed, or a sturdy whisk and some elbow grease, until the mixture is light and fluffy. This process incorporates air, which is crucial for a tender cookie. Next, gradually add the granulated sugar and the packed light brown sugar. Continue to beat until the mixture is well combined and has a creamy, uniform consistency. Scrape down the sides of the bowl periodically to ensure everything is evenly incorporated. The brown sugar will add a wonderful chegrape juicess and a hint of caramel flavor to the cookies.
Phase 2: Adding Wet Ingredients and Dry Ingredients
Once the butter and sugar mixture is perfectly creamed, it’s time to add the wet ingredients. Crack in the two large eggs, one at a time, beating well after each addition until fully incorporated. This ensures the eggs emulsify properly with the butter and sugar mixture. Stir in the pure vanilla extract for that classic warm cookie aroma and taste. In a separate medium bowl, whisk together the all-purpose floubeef hamthe graham crum extractker crumbs, baking soda, and salt. Whisking the dry ingredients together before adding them to the wet ingredients helps to distribute the leavening agents and salt evenly, preventing pockets of baking soda or salt in your cookies. Now, gradually add the dry ingredients to the wet ingredients in three additions, mixing on low speed or by hand until just combined. Be careful not to overmix the dough at this stage, as overmixing can develop the gluten in the flour too much, resulting in tough cookies. You want a cohesive dough that holds together.
Assembling the S’mores Sandwich Cookies
Phase 3: Forming the Cookies and Adding the Marshmallow-Chocolate Filling
Scoop rounded tablespoons of the cookie dough onto the prepared baking sheets, leaving about 2 inches between each cookie to allow for spreading. You can use a cookie scoop for uniform size. For the marshmallow-chocolate filling, grab another clean mixing bowl. In this bowl, gently combine the mini marshmallows and the semi-sweet chocolate chips. Now, for the peanut butter layer of your s’mores filling, take the remaining ¼ cup of creamy peanut butter. You can either gently stir this into the marshmallow and chocolate chip mixture, or you can spoon a small dollop of this peanut butter directly onto the center of half of your cookie dough balls before baking, and then top it with the marshmallow-chocolate mixture. Alternatively, and perhaps more straightforwardly for a s’mores effect, you will place a small spoonful of the marshmallow and chocolate chip mixture onto the center of about half of your cookie dough balls just before baking. This will allow them to melt and spread as the cookies bake. If you prefer a distinct peanut butter layer within the filling, you can also spread a thin layer of the ¼ cup peanut butter on the inside of the baked cookies after they have cooled slightly.
Phase 4: Baking and Creating the Sandwich
Bake the cookies in the preheated oven for 9 to 12 minutes, or until the edges are lightly golden brown and the centers are still slightly soft. The mini marshmallows and chocolate chips on top will have melted and bubbled up. For the best s’mores experience, it’s important to remove them from the oven when they are not completely baked through, as they will continue to cook on the baking sheet. Once the cookies are baked, let them cool on the baking sheets for a few minutes before transferring them to a wire rack to cool completely. This cooling period is essential for the cookies to set. Once the cookies have cooled enough to handle but are still slightly warm (this is key for the marshmallow to become wonderfully gooey), select pairs of cookies. On the bottom side of one cookie, spread a thin layer of the reserved ¼ cup of creamy peanut butter. Then, top this with a generous spoonful of the melted marshmallow and chocolate chip mixture from the top of its baked counterpart. Carefully press the second cookie onto the filling, creating a delightful s’mores sandwich.
Phase 5: The Final Touch and Enjoyment
Gently press the cookies together, allowing the gooey filling to ooze slightly. If the filling is too stiff to spread easily, you can pop it into the microwave for a few seconds to warm it slightly. The residual heat from the cookies will help to further melt the marshmallows and chocolate, creating that signature s’mores pull. You can also experiment with adding a small drizzle of melted chocolate over the top of the sandwich cookies for an extra decadent touch. For the most enjoyable experience, serve these Peanut Butter S’mores Sandwich Cookies warm, when the marshmallow filling is at its gooeyest and the peanut butter is soft and luscious. The combinationrum extract the nutty, crumbly cookie, the creamy peanut butter, the melted chocolate, and the sweet, sticky marshmallows creates an irresistible treat that’s a delightful twist on a classic campfire favorite. These cookies are perfect for sharing, or for indulgin extractg in a moment of pure, unadulterated bliss.

Conclusion:
There you have it – a simple yet incredibly satisfying recipe for Peanut Butter S’mores Sandwich Cookies! We’ve walked through creating these delightful treats, from the chewy peanut butter cookies to the gooey marshmallow and rich chocolate filling. These cookies are perfect for any occasion, whether you’re looking for a fun dessert to make with the kids, a unique addition to your bake snon-alcoholic ale, or just a personal indulgence. I truly hope you enjoy making and, more importantly, devouring these wonderful Peanut Butter S’mores Sandwich Cookies. They bring a smile to my face every single time!
For serving, I love them warm, right after they’ve had a moment to set, allowing the chocolate to be wonderfully melty. They also pair beautifully with a cold glass of milk or a hot cup of coffee.
Don’t be afraid to experiment with variations! You could try adding a pinch of sea salt to the cookie dough for an extra flavor dimension, or even drizzling them with more melted chocolate once cooled. Different types of chocolate, like dark or milk chocolate chips, can also add a unique twist.
FAQs about Peanut Butter S’mores Sandwich Cookies:
Can I make the cookie dough ahead of time?
Yes, absolutely! You can prepare the peanut butter cookie dough and store it in an airtight container in the refrigerator for up to 2-3 days. When you’re ready to bake, let the dough sit at room temperature for about 15-20 minutes to make it easier to scoop and shape. You can also freeze the dough balls for longer storage.
What if I don’t have marshmallow fluff?
If you don’t have marshmallow fluff, you have a few excellent alternatives. You can use mini marshmallows, which you’ll need to gently melt between the cookie and chocolate layers. Another option is to make a quick homemade marshmallow frosting or even use a thick chocolate ganache as the filling for a delicious variation.
Peanut Butter S’mores Cookies – Gooey & Delicious
A delightful twist on classic s’mores, these cookies combine chewy peanut butter cookie dough with gooey marshmallows and melted chocolate.
Ingredients
-
1 cup unsalted butter, softened
-
1 cup creamy peanut butter
-
1 cup granulated sugar
-
1 cup packed light brown sugar
-
2 large eggs
-
1 teaspoon pure vanilla extract
-
1½ cups all-purpose flour
-
1½ cups graham cracker crumbs
-
1 teaspoon baking soda
-
½ teaspoon salt
-
1 cup mini marshmallows
-
½ cup semi-sweet chocolate chips
-
¼ cup creamy peanut butter (for the filling)
Instructions
-
Step 1
Preheat oven to 350°F (175°C). Line baking sheets with parchment paper. Cream softened butter and 1 cup peanut butter until light and fluffy. Gradually add granulated and brown sugar, beating until well combined. -
Step 2
Beat in eggs one at a time, then stir in vanilla extract. In a separate bowl, whisk together flour, graham cracker crumbs, baking soda, and salt. Gradually add dry ingredients to wet ingredients in three additions, mixing until just combined. Do not overmix. -
Step 3
Scoop rounded tablespoons of dough onto prepared baking sheets. For the filling, combine mini marshmallows and chocolate chips in a bowl. Spoon a small dollop of this mixture onto the center of about half of the cookie dough balls just before baking. -
Step 4
Bake for 9-12 minutes, or until edges are lightly golden and centers are still soft. Let cool on baking sheets for a few minutes before transferring to a wire rack to cool completely. -
Step 5
Once cookies are cool enough to handle but still slightly warm, select pairs. On the bottom side of one cookie, spread a thin layer of the reserved ¼ cup peanut butter. Top with a generous spoonful of the melted marshmallow and chocolate chip mixture from its baked counterpart. Carefully press the second cookie onto the filling. -
Step 6
Gently press cookies together. Serve warm for the gooest filling.
Important Information
Nutrition Facts (Per Serving)
It is important to consider this information as approximate and not to use it as definitive health advice.
Allergy Information
Please check ingredients for potential allergens and consult a health professional if in doubt.