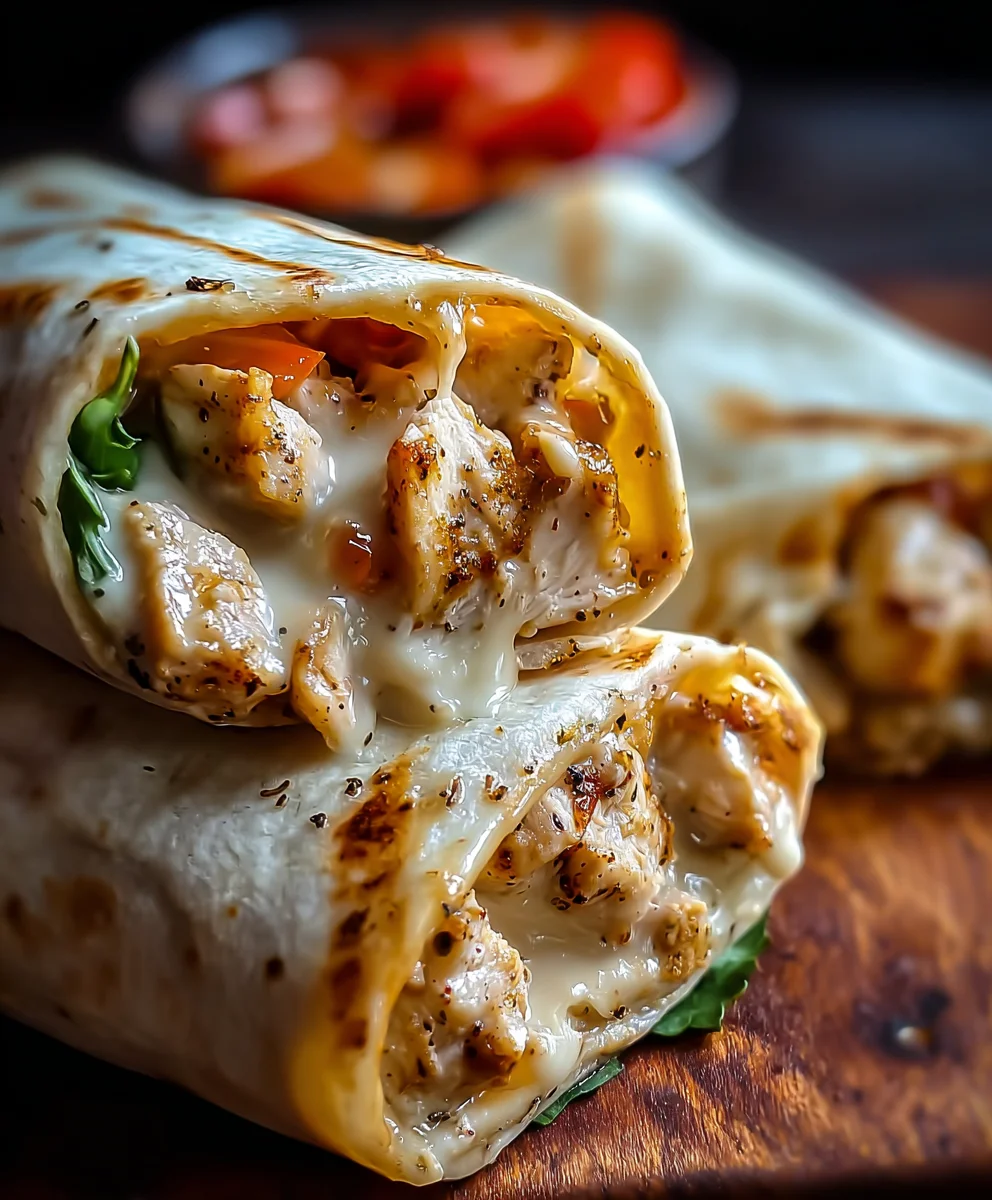
Cheesy Garlic Chicken Wraps – Easy Weeknight Meal
Cheesy Garlic Chicken Wraps are more than just a quick meal; they are a passport to pure comfort and undeniable deliciousness. Who can resist the allure of tender, garlicky chicken nestled within a soft tortilla, all bound together by a gooey, melted cheese embrace? We certainly can’t! This is the kind of dish that transforms an ordinary weeknight into a mini celebration, satisfying those cravings for something both hearty and incredibly flavorful. The magic of these Cheesy Garlic Chicken Wraps lies in the perfect harmony of simple, yet powerful ingredients – the savory depth of garlic, the satisfying chew of perfectly cooked chicken, and the irresistible creaminess of melted cheese. They’re a guaranteed crowd-pleaser, perfect for a speedy lunch, a casual dinner, or even a fun appetizer. Get ready to experience a flavor explosion that will have you reaching for seconds!
Ingredients:
- 2 cups cooked chicken (shredded or diced)
- 1 ½ cups shredded mozzarella or cheddar cheese
- ¼ cup cream cheese (softened)
- 2 tbsp butter (melted)
- 3 cloves garlic (minced)
- ¼ cup sour cream
- 1 tsp garlic powder
- 1 tsp Italian seasoning
- 4 large tortillas
- Salt and pepper (to taste)
- Fresh parsley (for garnish, optional)
Preparing the Cheesy Garlic Chicken Filling
Step 1: Infuse the Butter with Garlic
The foundation of our delicious Cheesy Garlic Chicken Wraps lies in a richly flavored garlic butter. In a small, microwave-safe bowl or a small saucepan over low heat, combine the 2 tablespoons of melted butter with the 3 cloves of minced garlic. If you’re using a microwave, heat in 15-second intervals, stirring between each, until the garlic is fragrant and just begin extractning to turn golden. Be careful not to burn the garlic, as this can impart a bitter taste to your filling. If you’re using a saucepan, a gentle, low simmer for about 1-2 minutes is all you need. This brief infusion allows the butter to absorb the pungent aroma and flavor of the fresh garlic. Once the garlic butter is ready, set it aside to cool slightly.
Step 2: Creating the Creamy Garlic Sauce Base
Now, let’s build the creamy binder for our chicken. In a medium-sized mixing bowl, add the ¼ cup of softened cream cheese. Softened cream cheese is crucial here; it will blend much more smoothly, preventing any lumpy texture in your filling. Add the ¼ cup of sour cream to the cream cheese. The sour cream brings a pleasant tang and helps to loosen the cream cheese, creating a beautifully creamy consistency. Next, add the infused garlic butter from Step 1 into this bowl. Stir everything together vigorously with a whisk or a sturdy spoon until it’s well combined and smooth. You want a cohesive sauce that will evenly coat the chicken.
Step 3: Flavoring the Creamy Mixture
To elevate the flavor profile of our Cheesy Garlic Chicken Wraps, we’ll introduce some key seasonings. To the creamy mixture you just prepared, add the 1 teaspoon of garlic powder and the 1 teaspoon of Italian seasoning. The garlic powder adds another layer of garlic goodness without the risk of burning, complementing the fresh garlic from the butter. The Italian seasoning, with its blend of herbs like oregano, basil, and thyme, provides an aromatic and savory depth that perfectly complements chicken and cheese. Season generously with salt and pepper to taste. Remember, the chicken and cheese will absorb these flavors, so don’t be shy with the seasoning. Stir these dry ingredients in thoroughly until everything is evenly distributed.
Step 4: Incorporating the Chicken and Cheese
This is where our Cheesy Garlic Chicken Wraps truly start to take shape! Add the 2 cups of cooked chicken (whether it’s shredded or diced) into the bowl with the creamy, garlicky sauce. Gently fold the chicken into the sauce, ensuring every piece is coated. Then, add the 1 ½ cups of shredded mozzarella or cheddar cheese. For the best melt, I recommend a blend of mozzarella for its stretchiness and cheddar for its sharper flavor, but either will be delicious. Continue to fold everything together until the cheese is distributed throughout the chicken mixture. The residual warmth from the chicken and the sauce will start to soften the cheese, making it wonderfully gooey.
Assembling and Cooking the Wraps
Step 5: Warming the Tortillas and Filling
To ensure our wraps are warm and the cheese is perfectly melted, we need to gently heat everything. Lay out your 4 large tortillas on a clean surface. You can warm them slightly in a dry skillet over medium heat for about 30 seconds per side, or wrap them in a damp paper towel and microwave for 20-30 seconds. This makes them pliable and less likely to tear when you roll them. Once the tortillas are warm, divide the cheesy chicken filling evenly among them, placing it slightly off-center. Don’t overfill, or rolling will become difficult.
Step 6: Rolling and Grilling the Wraps
Now it’s time to transform this delicious filling into irresistible wraps. Fold the sides of each tortilla inwards over the filling, then tightly roll from the bottom upwards to create a senon-alcoholic aled wrap. For that extra golden-brown crispiness and to further melt the cheese, we’ll grill them. Heat a lightly greased skillet or a griddle over medium heat. Carefully place the seam-side down of each wrap onto the hot skillet. Cook for about 3-4 minutes per side, or until the tortillas are golden brown and crispy, and you can see the cheese oozing out slightly. This grilling step adds fantastic texture and ensures all the flavors meld together beautifully.
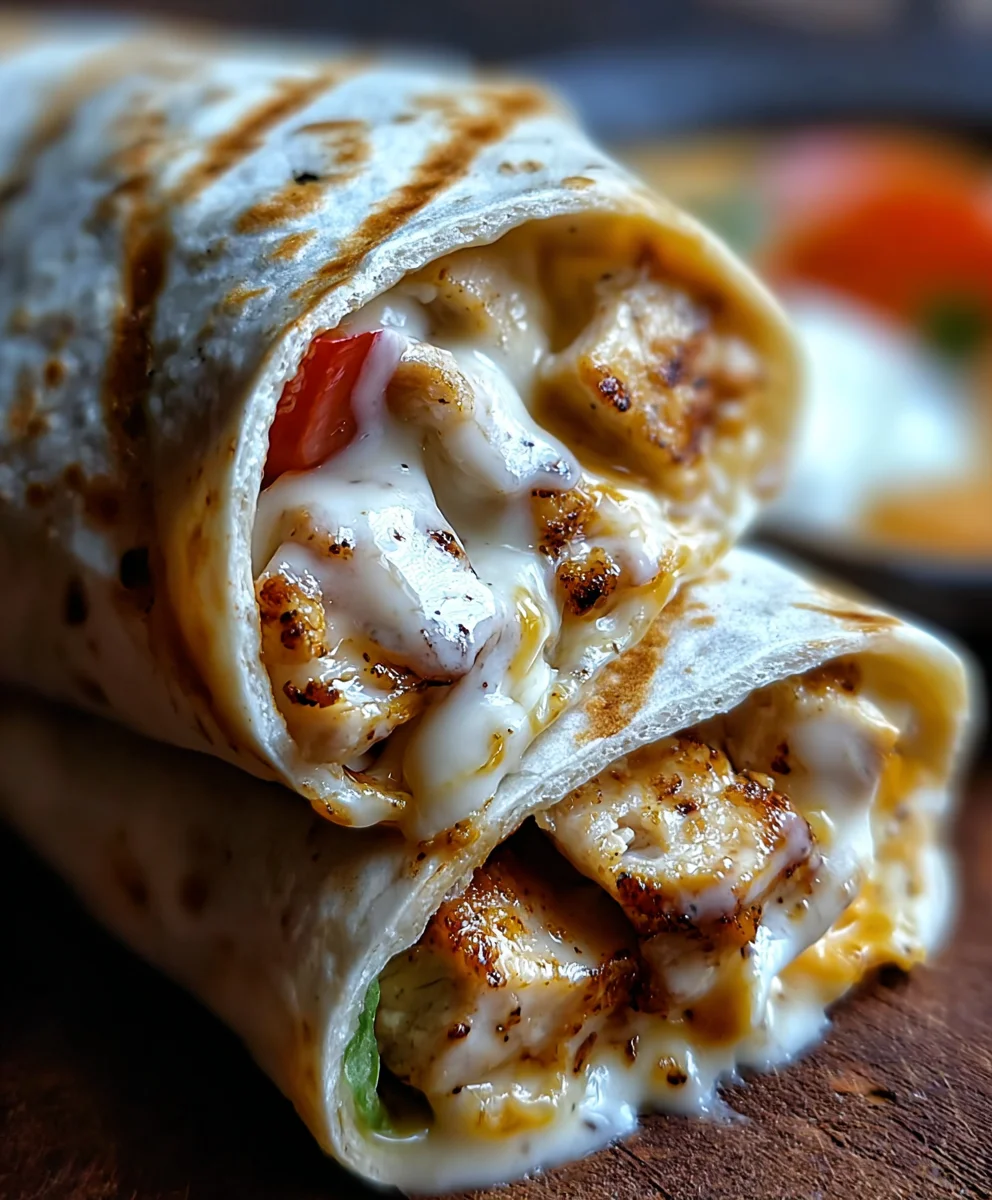
Step 7: Serving Your Cheesy Garlic Chicken Wraps
Once your wraps are beautifully golden and the cheese is delightfully melted, remove them from the skillet. Allow them to rest for a minute or two before slicing, if desired. This brief resting period helps the filling settle, making them easier to handle and eat. For an extra touch of freshness and color, garnish with freshly chopped parsley, if you have some on hand. The bright green parsley offers a lovely contrast to the golden-brown wrap and the rich filling. Serve these Cheesy Garlic Chicken Wraps immediately while they are warm and gooey for the ultimate satisfying meal. They’re perfect for a quick lunch, a hearty dinner, or even a party appetizer.
Conclusion:
And there you have it! Your journey to delicious Cheesy Garlic Chicken Wraps is complete. This recipe offers a delightful balance of savory chicken, pungent garlic, and gooey cheese, all nestled within a soft tortilla. It’s a wonderfully versatile meal that’s perfect for a quick weeknight dinner, a satisfying lunch, or even a casual get-together with friends. Don’t be afraid to experiment and make these Cheesy Garlic Chicken Wraps your own! We hope you enjoy every flavorful bite as much as we do.
For serving suggestions, these wraps are fantastic on their own, but they also pair wonderfully with a crisp side salad, some seasoned sweet potato fries, or even a cup of creamy tomato soup. When it comes to variations, consider adding some finely chopped bell peppers or red onion for extra crunch and flavor. A sprinkle of chili flakes can add a nice kick if you prefer a little heat. Feel free to swap out the type of cheese to suit your preference – cheddar, Monterey Jack, or a blend would all be delicious!
Frequently Asked Questions about Cheesy Garlic Chicken Wraps:
Q: Can I make the chicken filling ahead of time?
A: Absolutely! You can cook and shred the chicken mixture for your Cheesy Garlic Chicken Wraps up to two days in advance. Store it in an airtight container in the refrigerator. When you’re ready to assemble, simply warm the filling gently on the stovetop or in the microwave before wrapping.
Q: What kind of tortillas are best for these wraps?
A: Most standard-sized flour tortillas work wonderfully for Cheesy Garlic Chicken Wraps. If you prefer, whole wheat tortillas or even gluten-free options can be used. Just ensure they are pliable enough to wrap without tearing.
Cheesy Garlic Chicken Wraps – Easy Weeknight Meal
Quick and easy cheesy garlic chicken wraps perfect for a weeknight meal, featuring a creamy garlic sauce and melty cheese.
Ingredients
-
2 cups cooked chicken (shredded or diced)
-
1 ½ cups shredded mozzarella or cheddar cheese
-
¼ cup cream cheese (softened)
-
2 tbsp butter (melted)
-
3 cloves garlic (minced)
-
¼ cup sour cream
-
1 tsp garlic powder
-
1 tsp Italian seasoning
-
4 large tortillas
-
Salt and pepper (to taste)
-
Fresh parsley (for garnish, optional)
Instructions
-
Step 1
Infuse the butter with garlic: In a microwave-safe bowl or saucepan, combine melted butter and minced garlic. Heat gently until fragrant, being careful not to burn. Let cool slightly. -
Step 2
Create the creamy garlic sauce base: In a mixing bowl, combine softened cream cheese and sour cream. Add the infused garlic butter and whisk until smooth and well combined. -
Step 3
Flavor the creamy mixture: Add garlic powder, Italian seasoning, salt, and pepper to the creamy mixture. Stir until evenly distributed. -
Step 4
Incorporate chicken and cheese: Add cooked chicken to the creamy sauce and fold to coat. Stir in shredded cheese until distributed throughout the chicken mixture. -
Step 5
Warm tortillas and filling: Warm tortillas in a skillet or microwave until pliable. Divide the cheesy chicken filling evenly among the tortillas, placing it slightly off-center. -
Step 6
Roll and grill the wraps: Fold in the sides of each tortilla, then roll tightly from the bottom up. Grill in a lightly greased skillet over medium heat for 3-4 minutes per side, until golden brown and crispy. -
Step 7
Serve your wraps: Remove from skillet, let rest briefly, and garnish with fresh parsley if desired. Serve warm and gooey.
Important Information
Nutrition Facts (Per Serving)
It is important to consider this information as approximate and not to use it as definitive health advice.
Allergy Information
Please check ingredients for potential allergens and consult a health professional if in doubt.