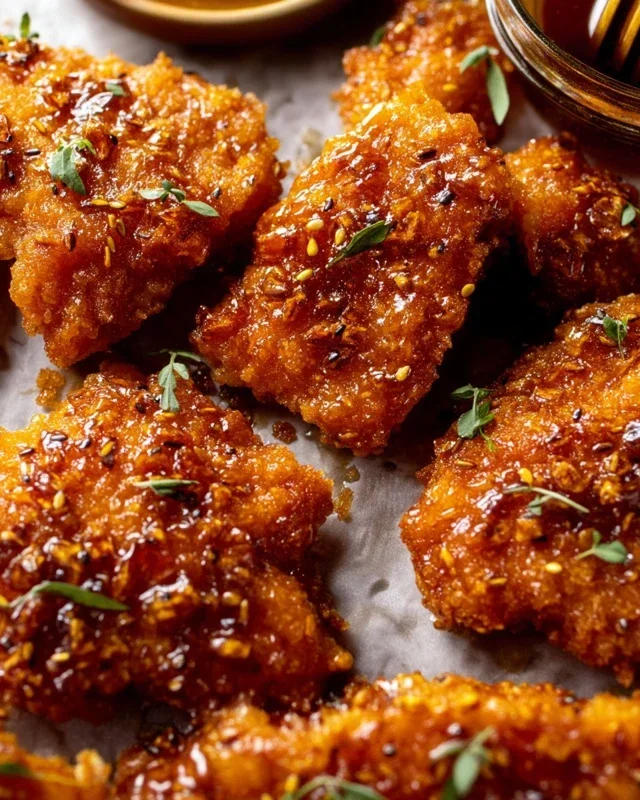
General Tso’s Chicken- Crispy Flavorful Easy Recipe
General Tso’s Chicken is a dish that sparks joy in so many of us, a beloved classic found on countless takeout menus and a perennial favorite for a reason. Who can resist those perfectly crispy, bite-sized pieces of chicken coated in a sticky, savory, and slightly sweet sauce? It’s the ultimate comfort food, delivering that satisfying crunch followed by a burst of complex flavors that dance on the palate. What truly elevates this dish beyond your average stir-fry is the masterful balance of sweet, sour, and savory, often with a subtle hint of heat that keeps you coming back for more. While we all appreciate the convenience of ordering in, there’s a unique satisfaction in recreating this iconic General Tso’s Chicken in your own kitchen, allowing you to control the quality of ingredients and customize the spice level to your exact liking. Get ready to impress yourself and your loved ones with this approachable yet utterly delicious version of a takeout legend.
Ingredients:
- 4 boneless, skinless chicken breasts, cut into 1-inch cubes
- 1 cup all-purpose flour (or cornstarch, for a crispier coating)
- 1 teaspoon paprika
- 2 teaspoons garlic salt
- 1 1/4 cups granulated sugar
- 1 cup water
- 1 cup white distilled vinegar
- 1 teaspoon salt
- 6 tablespoons soy sauce
- 1 teaspoon red chili pepper flakes (optional, for a touch of heat)
Preparing the Chicken
Step 1: Coat the Chicken Pieces
To begin extract crafting your delicious General Tso’s Chicken, the first crucial step is to prepare the chicken. Take your cubed chicken breasts and place them in a medium-sized bowl. Sprinkle the 1 cup of all-purpose flour (or cornstarch, if you prefer a lighter, crispier texture) over the chicken. Add the 1 teaspoon of paprika and the 2 teaspoons of garlic salt to the flour mixture. Now, using your hands or a spoon, toss the chicken gently until each piece is evenly coated with the seasoned flour. This coating is essential for creating that signature crispy exterior once the chicken is fried. Make sure there are no dry spots; a good coating will help the chicken fry up beautifully golden brown and hold onto the sauce. If the flour seems to be clumping, you can add a tiny bit more flour, but be careful not to overdo it, as too much flour can make the chicken taste doughy. Set the coated chicken aside for now.
Making the General Tso’s Sauce
Step 2: Combine Sauce Ingredients
While the chicken is resting, let’s get started on the star of the show – the General Tso’s sauce. In a medium saucepan, combine the 1 1/4 cups of granulated sugar, 1 cup of water, and 1 cup of white distilled vinegar. Add the 1 teaspoon of salt and the 6 tablespoons of soy sauce. If you enjoy a bit of heat, this is also the time to stir in the 1 teaspoon of red chili pepper flakes. Whisk these ingredients together thoroughly to ensure the sugar is dissolved as much as possible before heating. Place the saucepan over medium heat on your stovetop.
Step 3: Simmer and Thicken the Sauce
Bring the sauce mixture to a gentle simmer, stirring occasionally. As the sauce heats, the sugar will fully dissolve, and the flavorsgin extractll begin to meld. You’ll notice the mixture starting to thicken slightly. Continue to simmer the sauce for about 5 to 7 minutes, or until it reaches your desired consistency. You can test the thickness by dipping a spoon into the sauce; it should coat the back of the spoon. Be mindful that the sauce will thicken further as it cools. Avoid letting the sauce boil vigorously, as this can cause the sugar to burn and result in an unpleasant flavor. Once the sauce has thickened to your liking, remove the saucepan from the heat and set it aside.
Frying the Chicken
Step 4: Fry the Coated Chicken
Now it’s time to give our coated chicken pieces that irresistible crispiness. Heat about 1 inch of cooking oil (such as vegetable oil, canola oil, or peanut oil) in a large skillet or wok over medium-high heat. You want the oil to be hot enough that a small piece of chicken sizzles immediately upon contact. Carefully add the coated chicken pieces to the hot oil in a single layer, being careful not to overcrowd the pan. Overcrowding will lower the oil temperature and result in steamed, greasy chicken rather than crispy chicken. You may need to fry the chicken in batches.
Step 5: Achieve Golden Brown Perfection
Fry the chicken for about 3 to 5 minutes per batch, turning the pieces occasionally with tongs, until they are golden brown and cooked through. The exact cooking time will depend on the size of your chicken pieces and the temperature of your oil. You’re looking for a beautiful, crispy exterior. Once each batch of chicken is perfectly fried, use a slotted spoon or spider strainer to remove the chicken from the oil and place it on a plate lined with paper towels. This will help absorb any excess oil and maintain the crispiness of the chicken. Repeat this process with any remaining batches of chicken, ensuring the oil returns to the proper temperature between batches.
Combining and Serving
Step 6: Toss Chicken with Sauce
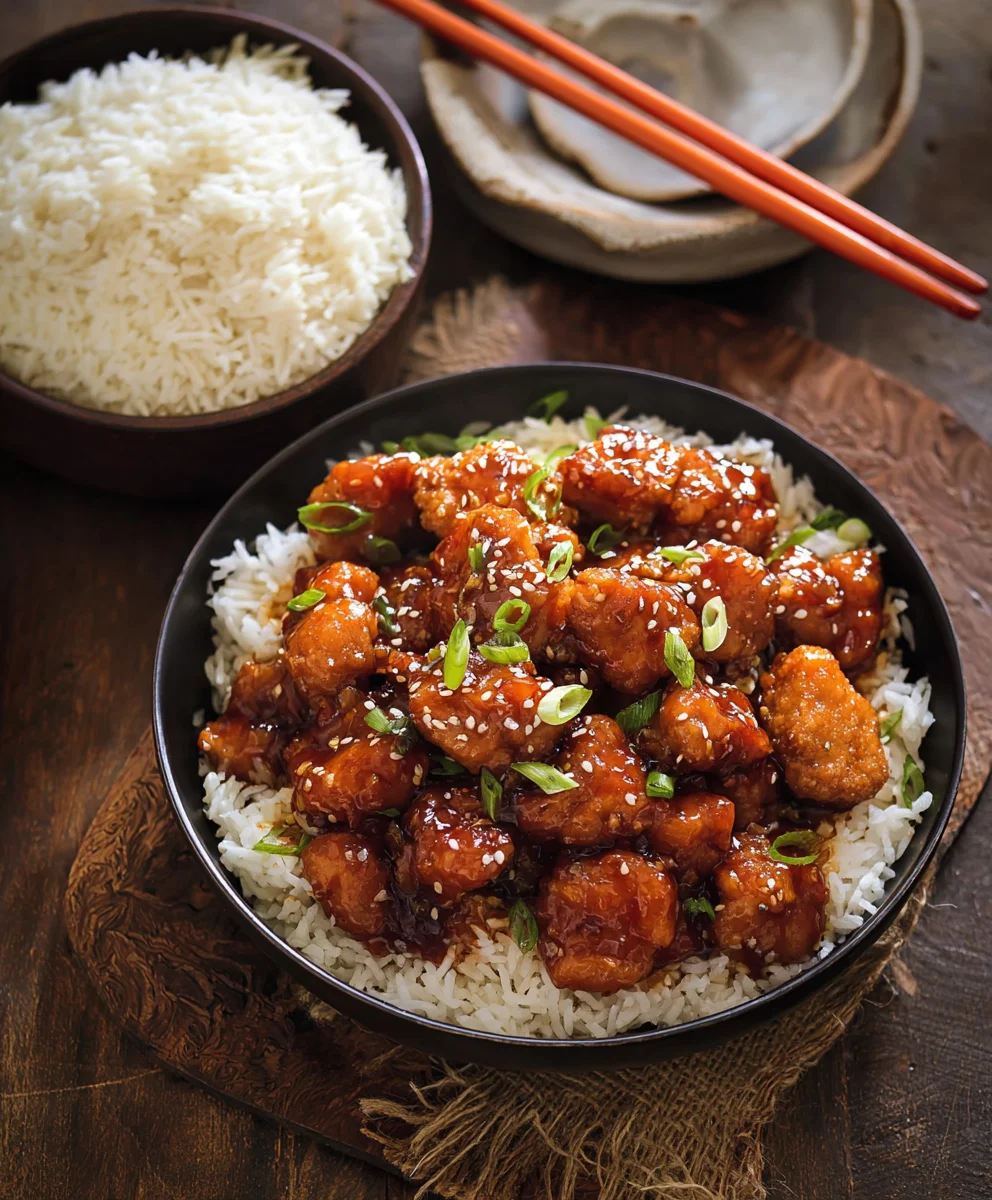
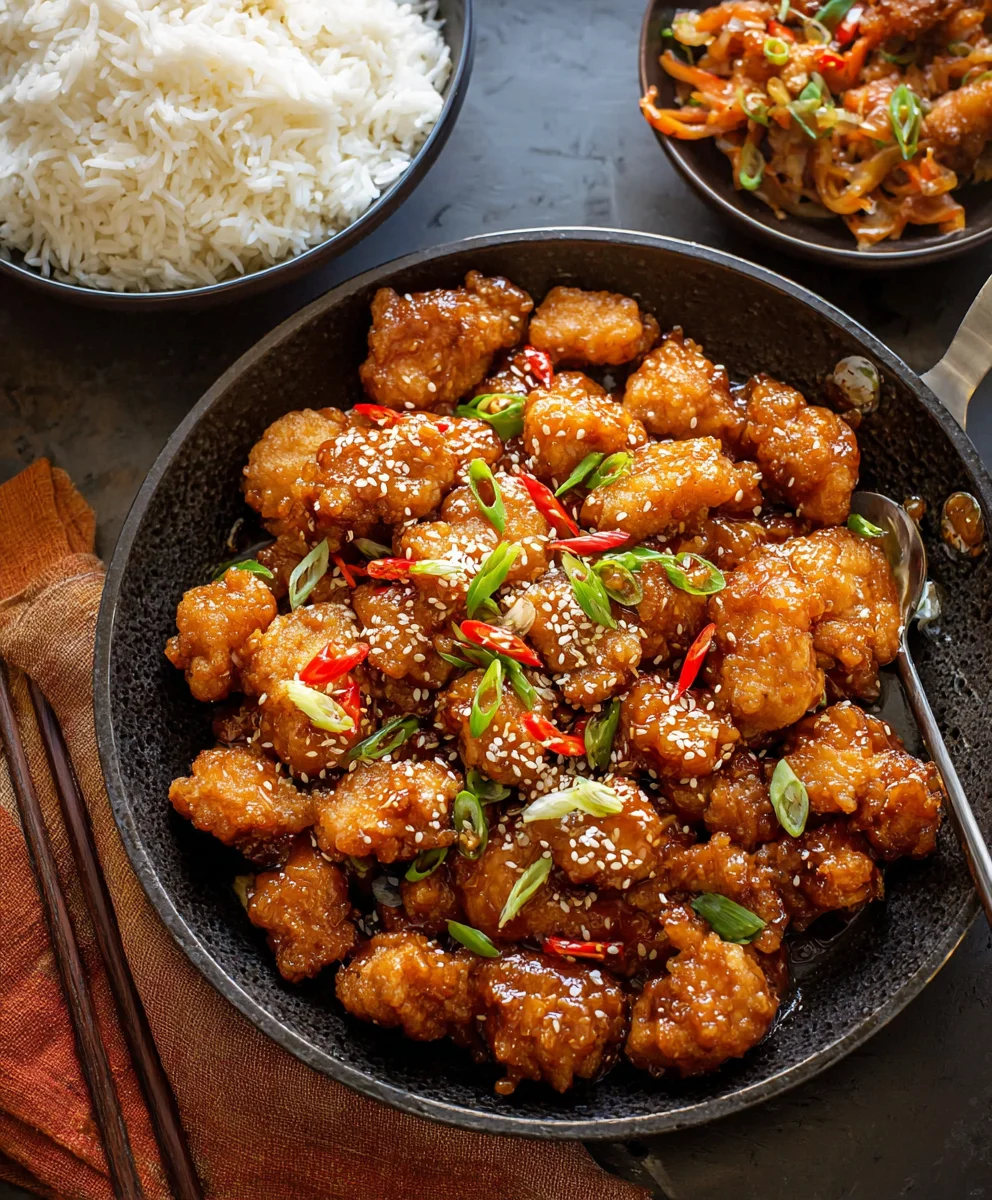
Once all of your chicken has been fried and is wonderfully crispy, it’s time to bring everything together. Return the saucepan with the prepared General Tso’s sauce to low heat. Add the fried chicken pieces to the saucepan. Gently toss the chicken in the warm sauce until each piece is evenly coated. The residual heat from the sauce will ensure it clings beautifully to the crispy chicken. Be sure to coat every single piece! This step should be done quickly to maintain the crispness of the chicken. Don’t let the chicken sit in the sauce for too long before serving, as it can become soggy. Serve your homemade General Tso’s Chicken immediately over steamed white rice, and garnish with sesame seeds and sliced green onions if desired. Enjoy the perfect balance of sweet, savory, and slightly tangy flavors with a delightful crispy texture!
Conclusion:
And there you have it! You’ve successfully recreated the delicious and satisfying General Tso’s Chicken in your own kitchen. This recipe aims to bring that perfect balance of sweet, savory, and slightly spicy flavors that make this dish a perennial favorite. We hope you enjoyed the process and are now looking forward to savoring every bite. This General Tso’s Chicken is incredibly versatile and pairs wonderfully with a variety of sides. For a classic experience, serve it piping hot over steamed white or brown rice. Steamed or stir-fried vegetables like broccoli, snap peas, or bell peppers also make fantastic accompaniments, adding a fresh crunch and vibrant color to your plate. Don’t be afraid to experiment with this recipe! You can adjust the spice level to your preference by adding more or less chili flakes, or even incorporating a dash of sriracha for an extra kick. If you’re feeling adventurous, consider adding toasted sesame seeds or chopped green onions as a garnish for an extra layer of flavor and texture.
Frequently Asked Questions:
Can I make General Tso’s Chicken less spicy?
Absolutely! If you find the spice level of General Tso’s Chicken too intense, you can significantly reduce it by using fewer red pepper flakes. You can also omit them entirely for a milder version. A small amount of honey or a touch more sugar can also help to balance out any lingering heat.
What kind of chicken is best for General Tso’s Chicken?
For the most tender and juicy General Tso’s Chicken, boneless, skinless chicken thighs are generally recommended. They stay moist and flavorful even when fried. However, boneless, skinless chicken breast will also work well, just be careful not to overcook it to prevent it from becoming dry.
General Tso’s Chicken – Crispy Flavorful Easy Recipe
A delicious and easy recipe for crispy, flavorful General Tso’s Chicken, featuring a perfectly coated chicken and a balanced sweet, savory, and tangy sauce.
Ingredients
-
4 boneless, skinless chicken breasts, cut into 1-inch cubes
-
1 cup all-purpose flour (or cornstarch, for a crispier coating)
-
1 teaspoon paprika
-
2 teaspoons garlic salt
-
1 1/4 cups granulated sugar
-
1 cup water
-
1 cup white distilled vinegar
-
1 teaspoon salt
-
6 tablespoons soy sauce
-
1 teaspoon red chili pepper flakes (optional, for a touch of heat)
Instructions
-
Step 1
Prepare the chicken by placing cubed chicken breasts in a bowl. Sprinkle with 1 cup of all-purpose flour (or cornstarch), 1 teaspoon of paprika, and 2 teaspoons of garlic salt. Toss gently until each piece is evenly coated. Set aside. -
Step 2
In a medium saucepan, combine 1 1/4 cups granulated sugar, 1 cup water, 1 cup white distilled vinegar, 1 teaspoon salt, and 6 tablespoons soy sauce. Stir in 1 teaspoon red chili pepper flakes (if using). Whisk to dissolve sugar. -
Step 3
Place the saucepan over medium heat and bring the sauce to a gentle simmer. Stir occasionally and let it simmer for 5 to 7 minutes, or until it thickens slightly and coats the back of a spoon. Remove from heat. -
Step 4
Heat about 1 inch of cooking oil in a large skillet or wok over medium-high heat. Carefully add the coated chicken pieces in a single layer, avoiding overcrowding. Fry in batches if necessary. -
Step 5
Fry the chicken for 3 to 5 minutes per batch, turning occasionally, until golden brown and cooked through. Remove with a slotted spoon and place on a plate lined with paper towels. -
Step 6
Return the sauce to low heat. Add the fried chicken pieces and toss gently until evenly coated. Serve immediately over steamed white rice, garnished with sesame seeds and sliced green onions if desired.
Important Information
Nutrition Facts (Per Serving)
It is important to consider this information as approximate and not to use it as definitive health advice.
Allergy Information
Please check ingredients for potential allergens and consult a health professional if in doubt.