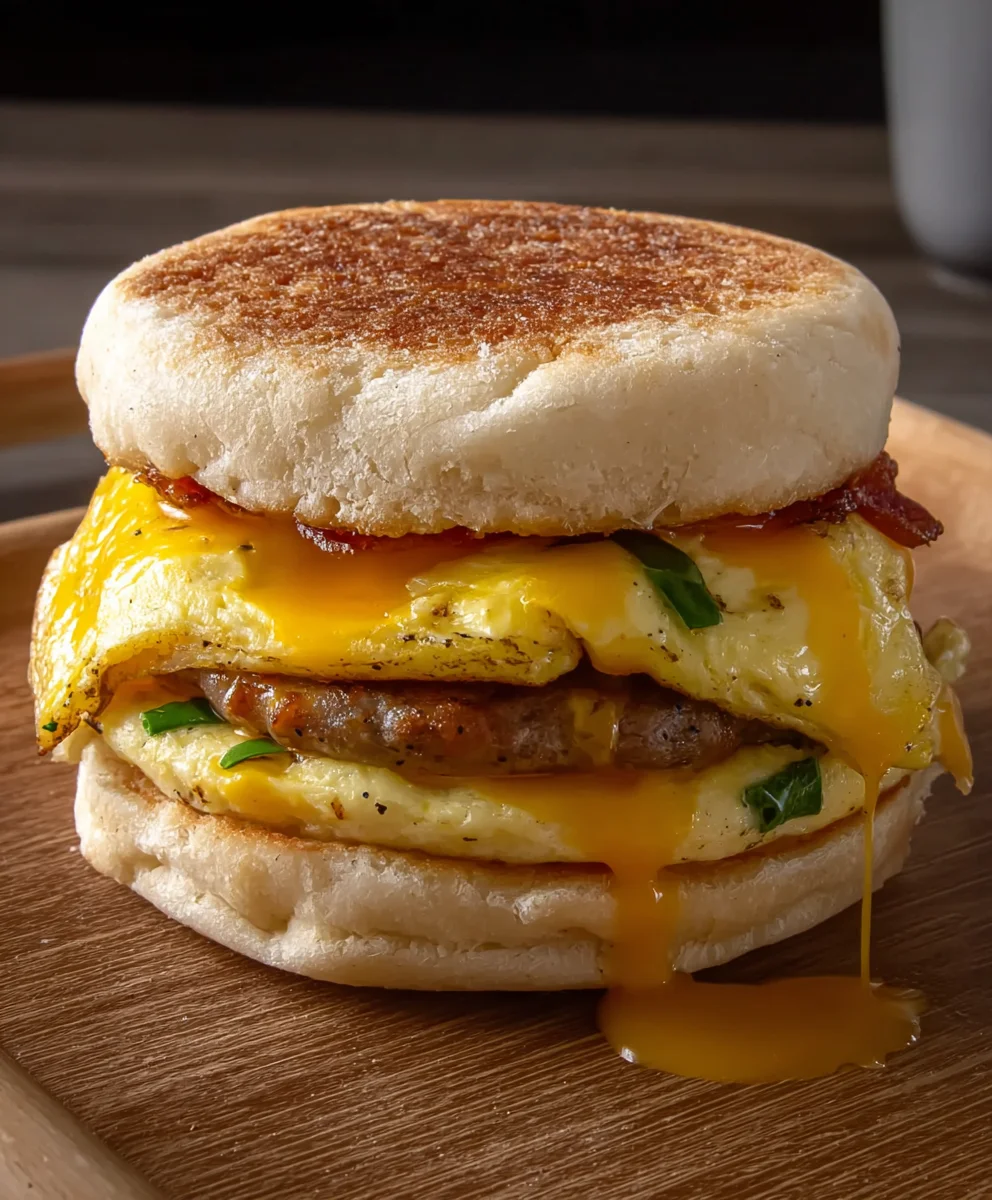
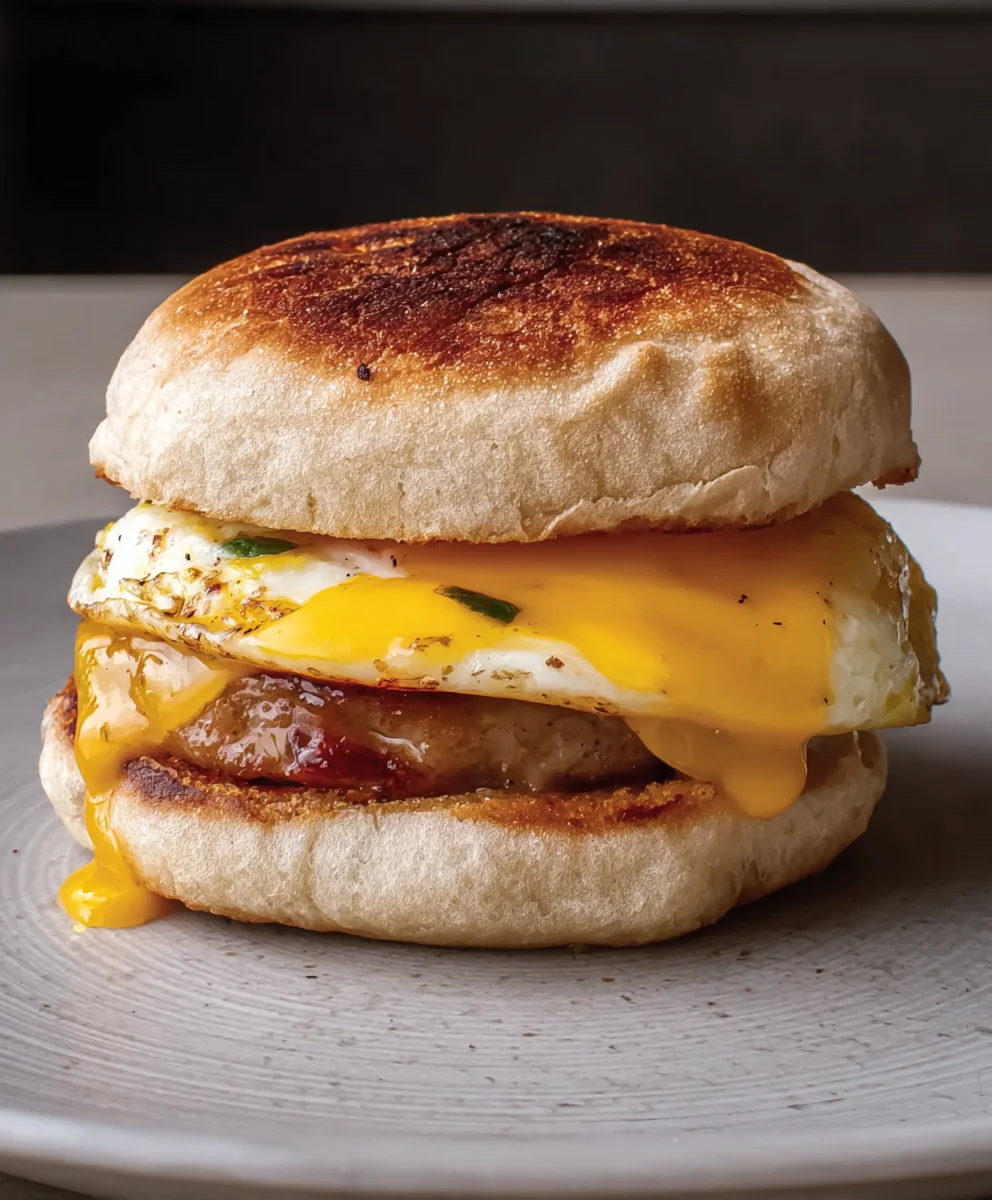
Easy Beef Freezer Breakfast Sandwiches-Quick Morning Meals
Freezer breakfast sandwiches are an absolute game-changer for busy mornings. If you’ve ever found yourself staring into the fridge, rum extractmagin extractg for a quick bite before rushing out the door, you know the struggle is real. That’s where the magic of these make-ahead wonders comes in. People adore them because they deliver that satisfying, hearty start to the day without any of the morning fgin extract. Imagine this: a warm, perfectly assembled breakfast sandwich ready to be zapped in the microwave in mere minutes. What truly makes our approach to freezer breakfast sandwiches special is the ability to customize every single layer. Forget boring, pre-packaged options; we’re talking about building your dream breakfast, from the fluffy egg to your favorite cheese and a perfectly seasoned protein, all tucked between a soft bun or English muffin, ready for those hectic days.
Ingredients:
- 1 pound ground beef
- 1 pound ground sausage
- 1 tablespoon brown sugar
- 1 teaspoon garlic powder
- 1 teaspoon onion powder
- 1/2 teaspoon red pepper flakes
- 1 teaspoon Italian seasoning
- 12 large eggs
- 1/4 cup milk
- 1 teaspoon salt
- 1 teaspoon white pepper
- 6 English muffins
- 6 slices cheese (cheddar, American, or your favorite)
- 2 tablespoons melted butter
- Syrup, for serving (optional)
Preparing the Savory Patties
Step 1: Cook the Ground Meats
Let’s get started by creating the delicious, savory filling for our Freezer Breakfast Sandwiches. In a large skillet, crum extractble both the ground beef and ground sausage. Place the skillet over medium-high heat and begin extract to brown the meats, breaking them up with a spoon or spatula as they cook. You want to cook them until they are no longer pink and most of the excess grease has rendered out. This process usually takes about 10-15 minutes. Once the meats are thoroughly cooked, carefully drain off any remaining fat. This step is crucial for preventing greasy sandwiches and ensuring a pleasant texture.
Step 2: Season and Combine the Patties
Now for the flavor! To the drained ground meats in the skillet, add the brown sugar, garlic powder, onion powder, red pepper flakes, and Italian seasoning. Stir everything together well to distribute the seasonings evenly. Continue to cook for another 2-3 minutes, stirring frequently, allowing the flavors to meld and the brown sugar to slightly caramelize. This combination of spices creates a wonderfully savory and slightly sweet profile that pairs perfectly with eggs and cheese. Taste a small pinch of the mixture (carefully, as it will be hot) to adjust seasonings if you desire, perhaps adding a touch more salt or pepper.
Crafting the Egg Component
Step 3: Prepare the Egg Mixture
While the meat mixture cools slightly, let’s prepare the eggs. In a medium-sized bowl, crack all 12 large eggs. Add the 1/4 cup of milk, 1 teaspoon of salt, and 1 teaspoon of white pepper. Whisk everything together vigorously until the yolks and whites are completely combined and the mixture is frothy. The milk helps to make the eggs a little lighter and fluffier, while the salt and pepper enhance their natural flavor. For consistent results when cooking, it’s a good idea to have your egg mixture ready before you start the cooking process for the eggs.
Step 4: Cook the Egg Rounds
This is where we’ll create the perfect egg discs for our sandwiches. You have a couple of options here for even cooking. One method is to use a large, non-stick skillet. Pour about half of the egg mixture into the skillet over medium heat. Cook, stirring gently and allowing the eggs to set. Once they are mostly cooked but still slightly moist, you can press them into a flat layer. You’ll then need to cut them into shapes that fit your English muffins. Alternatively, for a more uniform shape and easier assembly, consider using a muffin tin or individual round egg molds. Lightly grease your muffin tin or molds. Pour the egg mixture evenly into each cavity or mold, filling them about two-thirds of the way full. Bake in a preheated oven at 350°F (175°C) for about 15-20 minutes, or until the eggs are set and cooked through. If using a skillet, continue to cook in batches, cutting each cooked egg into rounds that fit your English muffins.
Assembling and Freezing Your Sandwiches
Step 5: Assemble and Wrap the Sandwiches
Now for the assembly! Toast your English muffins until they are lightly golden and slightly crisp. This helps them hold up better when reheated. Split each English muffin in half. On the bottom half of each muffin, place a slice of your chosen cheese. Then, place a portion of the savory meat mixture on top of the cheese. Finally, add one of your cooked egg rounds to complete the sandwich. Don’t worry if they aren’t perfectly uniform; these are homemade! Once assembled, brush the top half of each English muffin with the 2 tablespoons of melted butter. This butter adds a lovely richness and helps the muffins brown slightly when reheated. Wrap each assembled sandwich tightly in plastic wrap, ensuring a good seal. Then, for extra protection and to prevent freezer burn, wrap each individually wrapped sandwich again in aluminum foil or place them in a freezer-safe bag. Label each package with the date. These Freezer Breakfast Sandwiches can be stored in the freezer for up to 2-3 months. When you’re ready to enjoy one, remove the foil and plastic wrap, then microwave for 1-2 minutes or toast in a toaster oven until heated through. Serve with syrup on the side for a sweet and savory breakfast experience.
Conclusion:
You’ve now unlocked the secret to stress-free mornings with these incredible Freezer Breakfast Sandwiches! We’ve walked through how to prepare these make-ahead marvels, ensuring you have a delicious and satisfying breakfast ready in minutes, no matter how hectic your schedule gets. The beauty of these Freezer Breakfast Sandwiches lies in their versatility, allowing you to customize them to your exact cravings. Whether you’re a fan of classic eggs and cheese, or prefer something heartier with sausage or beef bacon, these sandwiches are a blank canvas for your culinary creativity. Whip up a batch this weekend and enjoy the gift of extra time and deliciousness throughout the week!
For serving suggestions, these Freezer Breakfast Sandwiches are perfect on their own for a quick grab-and-go option. You can also pair them with a side of fresh fruit, a small yogurt cup, or even some hash browns if you have a bit more time. They truly are a complete breakfast solution.
Frequently Asked Questions:
How long do Freezer Breakfast Sandwiches last in the freezer?
When properly wrapped and stored, these Freezer Breakfast Sandwiches can last for up to 2-3 months in the freezer. Ensuring they are tightly senon-alcoholic aled in plastic wrap and then an airtight container or freezer bag will help maintain their quality and prevent freezer burn.
Can I make these Freezer Breakfast Sandwiches vegetarian or vegan?
Absolutely! For vegetarian options, you can omit the meat and focus on eggs, cheese, and plenty of sautéed vegetables like mushrooms, peppers, and onions. For vegan variations, use plant-based egg substitutes, vegan cheese, and your favorite plant-based sausagbeef baconbacon alternatives. The principles of assembly remain the same.
What are some good variations for Freezer Breakfast Sandwiches?
The possibilities are endless! Try adding a slice of tomato, some avocado, a drizzle of hot sauce, or even a sprinkle of red pepper flakes for a kick. Different cheeses like cheddar, Swiss, or pepper jack can also add delightful flavor profiles. You can also experiment with different types of bread, such as English muffins, bagels, or even croissants for a touch of indulgence.
Easy Beef Freezer Breakfast Sandwiches
Quick and easy freezer breakfast sandwiches perfect for busy mornings. These sandwiches feature savory beef and sausage patties, fluffy eggs, and melted cheese on toasted English muffins.
Ingredients
-
1 pound ground beef
-
1 pound ground beef (formerly sausage)
-
1 tablespoon brown sugar
-
1 teaspoon garlic powder
-
1 teaspoon onion powder
-
1/2 teaspoon red pepper flakes
-
1 teaspoon Italian seasoning
-
12 large eggs
-
1/4 cup milk
-
1 teaspoon salt
-
1 teaspoon white pepper
-
6 English muffins
-
6 slices cheese
-
2 tablespoons melted butter
-
Syrup, for serving
Instructions
-
Step 1
Cook the ground beef and ground beef (formerly sausage) in a large skillet over medium-high heat until browned and no longer pink. Drain off excess grease. -
Step 2
Add brown sugar, garlic powder, onion powder, red pepper flakes, and Italian seasoning to the cooked meats. Cook for another 2-3 minutes, stirring frequently, until flavors meld. -
Step 3
In a medium bowl, whisk together 12 large eggs, 1/4 cup milk, 1 teaspoon salt, and 1 teaspoon white pepper until frothy. -
Step 4
Cook the egg mixture into rounds that fit the English muffins. This can be done by cooking in a non-stick skillet and cutting, or by baking in greased muffin tin cavities at 350°F (175°C) for 15-20 minutes. -
Step 5
Toast English muffins. Assemble sandwiches by placing cheese, then a portion of the meat mixture, and then an egg round on the bottom half of each muffin. Brush the top half of each muffin with melted butter. -
Step 6
Wrap each assembled sandwich tightly in plastic wrap, then in aluminum foil or a freezer-safe bag. Label with the date. Store in the freezer for up to 2-3 months. To reheat, remove wrapping and microwave for 1-2 minutes or toast in a toaster oven. Serve with syrup if desired.
Important Information
Nutrition Facts (Per Serving)
It is important to consider this information as approximate and not to use it as definitive health advice.
Allergy Information
Please check ingredients for potential allergens and consult a health professional if in doubt.