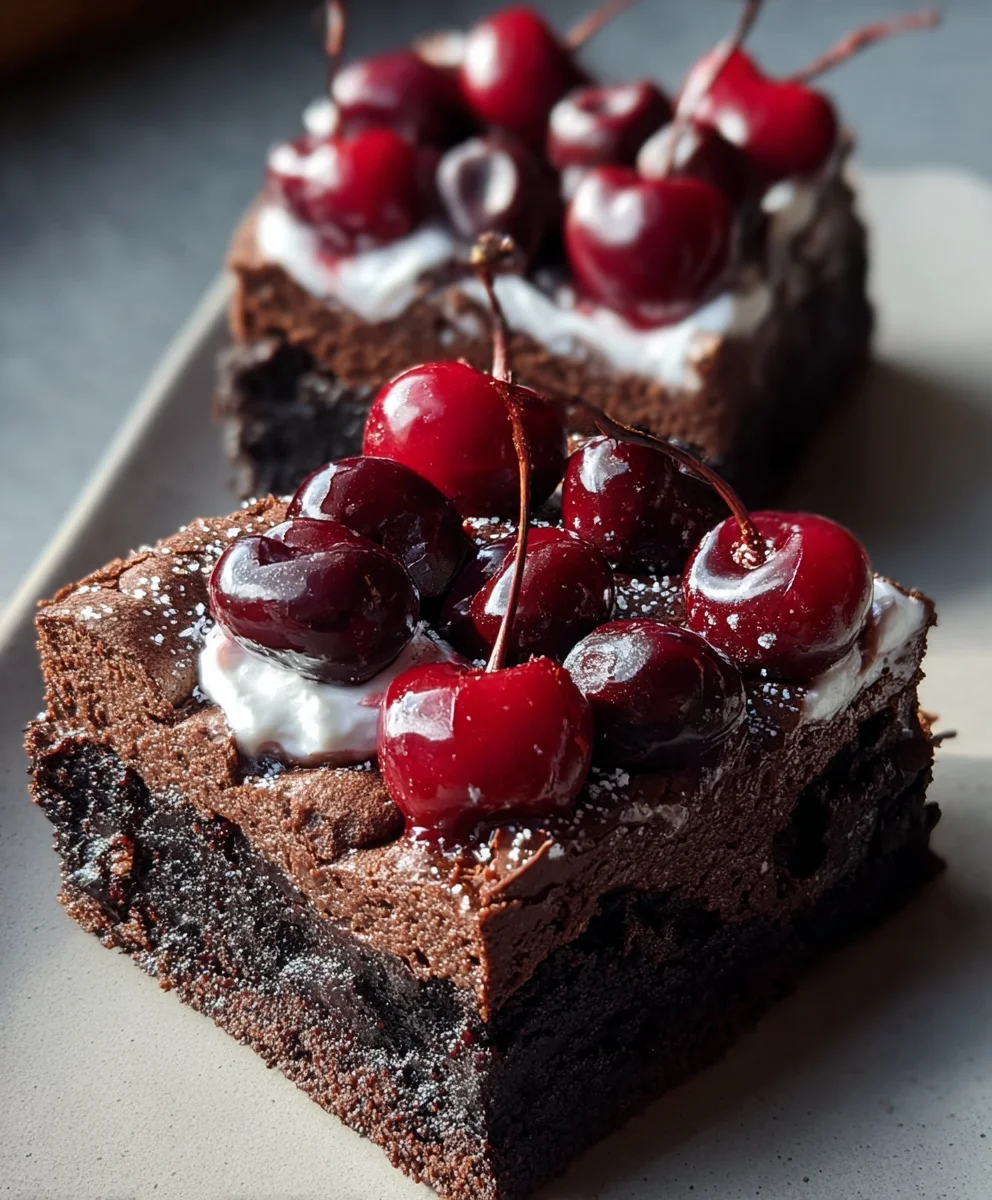
Small-Batch Black Forest Brownies-Decadent & Easy
Small-Batch Black Forest Brownies are more than just a dessert; they’re a decadent adventure for your taste buds. Imagin extracte the rich, fudgy intensity of a classic brownie, elevated by the signature flavors of the Black Forest cake. This isn’t just a brownie; it’s a miniature masterpiece designed to satisfy your deepest chocolate cravings without overwhelming you with leftovers. We all love a good brownie, that comforting, chewy square of pure joy, but what makes these Small-Batch Black Forest Brownies truly special is their sophisticated twist. The interplay of dark chocolate, tart cherries, and a whisper of kirsch extract (or cherry juice for an non-alcoholic alternative-free option) creates a flavor profile that is both intensely chocolatey and refreshingly fruity. It’s that perfect balance that makes them so utterly irresistible and surprisingly easy to enjoy all by yourself, or to share with a select few who appreciate a truly exquisite treat. Get ready to fall in love with small-batch baking all over again.

Ingredients:
- ¼ cup unsalted butter, cut into cubes
- ½ cup granulated sugar
- 1 large egg, at room temperature
- ½ tsp vanilla extract
- ¼ cup unsweetened cocoa powder
- ¼ cup all-purpose flour
- ⅛ tsp salt
- ½ cup canned or jarred cherries (such as Maraschino), drained, juice reserved for later
- 2 tbsp cherry juice (reserved from the canned cherries)
- ½ cup whipped cream, for serving
- Chocolate shavings, for garnish (optional)
Getting Started: Preparing Your Small-Batch Black Forest Brownies
Preheating and Pan Prep
Before we even think about mixing, let’s get our workspace ready. This is crucial for any baking project, ensuring even cooking and easy cleanup. Preheat your oven to 350°F (175°C). For this small batch, an 8×8 inch baking pan is perfect. To make sure our brownies lift out beautifully without sticking, I like to line the pan with parchment paper. Cut a piece that fits the bottom and goes up the sides a bit, creating “handles.” This makes lifting the finished brownies out a breeze. If you don’t have parchment paper, you can grease and flour the pan thoroughly, but parchment is my preferred method for a foolproof release. Make sure the butter is cut into smaller cubes, about ½ inch, as this will help it melt more evenly. Also, ensure your egg is at room temperature; this helps it emulsify better with the other ingredients, leading to a smoother batter.
Mixing the Brownie Batter
Melting the Butter and Sugar
In a medium-sized, heatproof bowl set over a saucepan of simmering water (a double boiler setup), add the cubed unsalted butter. Let it melt completely, stirring occasionally. Once melted, remove the bowl from the heat. Whisk in the granulated sugar until it’s well combined and the mixture looks glossy. Don’t worry if it’s not perfectly smooth at this stage. The residual heat will help dissolve the sugar further as we proceed. This step is important for developing the characteristic chewy texture of good brownies.
Incorporating Wet Ingredients and Dry Ingredients
Now, let’s add the flavor enhancers. Stir in the large egg and the vanilla extract into the butter and sugar mixture. Whisk vigorously for about a minute until everything is thoroughly combined and the mixture starts to lighten in color. This is where the emulsion begin extracts to form, which will give our brownies structure. In a separate, small bowl, whisk together the cocoa powder, all-purpose flour, and salt. Sifting the cocoa powder and flour beforehand can help prevent lumps, ensuring a uniformly smooth batter. Gradually add the dry ingredients to the wet ingredients, stirring gently with a spatula or wooden spoon until just combined. Be careful not to overmix here; overmixing can develop the gluten in the flour too much, resulting in tough brownies. A few streaks of flour are perfectly fine and will disappear as we continue.
Adding the Black Forest Magic
Preparing the Cherries and Cherry Syrup
While our batter is coming together, let’s prepare the stars of our Black Forest brownies: the cherries. If you’re using whole canned cherries, gently drain them, making sure to catch the delicious cherry juice in a small bowl – we’ll need this! Roughly chop about half of the drained cherries. These chopped pieces will be folded into the batter to create delightful bursts of cherry flavor and texture within the brownie. The remaining whole cherries can be reserved for decorating the top of the brownies after baking, or for enjoying on the side with a dollop of whipped cream.
Folding in the Cherries and Baking
Gently fold the chopped cherries into the brownie batter. Be sure to distribute them evenly throughout the mixture. Now, carefully pour the batter into your prepared baking pan, spreading it out evenly with your spatula. The batter will be quite thick. For that extra layer of Black Forest goodness, drizzle the reserved 2 tbsp of cherry juice over the top of the batter. You can use a toothpick or a skewer to gently swirl the juice into the batter for a marbled effect, but avoid overmixing. Place the pan in your preheated oven and bake for 20-25 minutes. You’ll know they’re done when a toothpick inserted into the center comes out with moist crum extractbs attached, but not wet batter. Don’t overbake, as this can lead to dry brownies.
Finishing and Serving Your Masterpiece
Cooling and Cutting
Once baked, carefully remove the pan from the oven and let the brownies cool completely in the pan on a wire rack. This is a crucial step for achieving that perfect fudgy texture. Resist the urge to cut them while they are warm; the brownies need time to set. Once cooled, use the parchment paper “handles” to lift the entire slab of brownies out of the pan onto a cutting board. For clean cuts, use a sharp knife that has been warmed slightly in hot water and then wiped dry between each cut. This prevents sticking and ensures neat, beautiful squares.
Garnishing and Enjoying
Now for the final flourish! Top each brownie with a generous dollop of whipped cream. If you reserved any whole cherries, place one on top of the whipped cream as a beautiful garnish. For an extra touch of indulgence, sprinkle some chocolate shavings over the whipped cream. The combination of rich, fudgy brownie, tart cherries, creamy whipped cream, and a hint of chocolate is pure bliss. These small-batch Black Forest brownies are perfect for a treat any time of day, or as a delightful dessert after a meal. Enjoy every decadent bite!
Conclusion:
And there you have it – your guide to crafting delectable Small-Batch Black Forest Brownies! We’ve walked through each step, from the rich cocoa base to the vibrant cherry topping, ensuring a truly indulgent experience. These brownies are a perfect testament to how a smaller batch can deliver immense flavor and satisfaction, ideal for those times when you crave a decadent treat without an overwhelming quantity. They are wonderfully versatile, proving to be an excellent dessert to share with a few loved ones or to simply savor yourself over a couple of days.
For serving suggestions, consider pairing your Small-Batch Black Forest Brownies with a dollop of freshly whipped cream or a scoop of vanilla bean ice cream. A dusting of cocoa powder or a few extra chocolate shavings can elevate their presentation even further. If you’re feeling adventurous with variations, try incorporating a splash of kirsch extract liqueur extract into the batter for an authentic Black Forest touch, or use dark chocolate chips for an even more intense cocoa flavor. Don’t be afraid to experiment with different types of cherries, like amarena cherries for a unique twist. Baking these Small-Batch Black Forest Brownies is a rewarding process, and the delicious outcome is well worth the effort. Enjoy every fudgy, cherry-infused bite!
Frequently Asked Questions:
Can I make these Small-Batch Black Forest Brownies ahead of time?
Absolutely! These brownies are even better when they have a chance to sit for a day. This allows the flavors to meld beautifully and the texture to become even fudgier. Store them in an airtight container at room temperature for up to 3 days.
What kind of cherries should I use for Small-Batch Black Forest Brownies?
For the classic Black Forest flavor, tart or sour cherries are traditional. You can use fresh, frozen, or even good quality canned cherries (well-drained). If using sweet cherries, you might want to slightly reduce the sugar in the recipe or add a squeeze of lemon juice to balance the sweetness.
Small-Batch Black Forest Brownies-Decadent & Easy
Easy and decadent small-batch brownies with a Black Forest twist, featuring rich chocolate, tart cherries, and creamy whipped cream.
Ingredients
-
¼ cup unsalted butter, cut into cubes
-
½ cup granulated sugar
-
1 large egg, at room temperature
-
½ tsp vanilla extract
-
¼ cup unsweetened cocoa powder
-
¼ cup all-purpose flour
-
⅛ tsp salt
-
½ cup canned or jarred cherries, drained, juice reserved
-
2 tbsp cherry juice (reserved from the canned cherries)
-
½ cup whipped cream, for serving
-
Chocolate shavings, for garnish (optional)
Instructions
-
Step 1
Preheat oven to 350°F (175°C). Line an 8×8 inch baking pan with parchment paper. -
Step 2
In a heatproof bowl set over simmering water, melt butter. Whisk in granulated sugar until glossy. -
Step 3
Stir in egg and vanilla extract until combined and lighter in color. In a separate bowl, whisk together cocoa powder, flour, and salt. Gradually add dry ingredients to wet ingredients, stirring until just combined. Do not overmix. -
Step 4
Gently fold in chopped drained cherries. Pour batter into prepared pan and spread evenly. Drizzle reserved cherry juice over the top and swirl gently with a toothpick. -
Step 5
Bake for 20-25 minutes, or until a toothpick inserted into the center comes out with moist crumbs. Let cool completely in the pan on a wire rack. -
Step 6
Lift brownies out using parchment paper handles. Cut into squares. Top with whipped cream and optional chocolate shavings.
Important Information
Nutrition Facts (Per Serving)
It is important to consider this information as approximate and not to use it as definitive health advice.
Allergy Information
Please check ingredients for potential allergens and consult a health professional if in doubt.