Banana Pudding Rice Krispie Treats-Easy Dessert
Banana Pudding Rice Krispie Treats are more than just a nostalgic childhood snack; they’re a delightful fusion of creamy, sweet, and satisfying textures that will transport you straight back to grandma’s kitchen with a modern, craveable twist. Imagin extracte the comforting embrace of classic banana pudding, where ripe bananas mingle with velvety vanilla custard, all captured within the chewy, slightly crispy perfection of a Rice Krispie treat. This isn’t your average cereal bar; it’s a gourmet upgrade that appeals to both the inner child and the sophisticated palate. What makes these Banana Pudding Rice Krispie Treats so utterly irresistible? It’s the ingenious combination of familiar flavors and an unexpected textural playground. We’ve managed to capture the essence of that beloved dessert and transform it into a portable, dippable, and incredibly addictive confection that’s perfect for parties, afternoon pick-me-ups, or simply when a craving strikes for something truly special.
Ingredients:
- 3 tablespoons butter, melted
- 1 (10 oz) bag miniature marshmallows
- 1 (3.4 oz) box instant banana pudding mix
- 6 cups Rice Krispies cereal
- Crushed Nilla Wafers, for topping
Getting Started: Preparing Your Workspace and Equipment
Before we dive into the fun of making these delightful Banana Pudding Rice Krispie Treats, it’s crucial to get your kitchen prepped. This will ensure a smooth and speedy process, preventing your marshmallow mixture from hardening before you can combine everything. First, gather all your ingredients. Having everything measured out and ready to go is a game-changer. Next, lightly grease an 8×8 inch baking pan with butter or cooking spray. You can also line it with parchment paper, leaving an overhang on the sides for easy lifting later. This step is vital for preventing the sticky treats from adhering to the pan. You’ll also want a large mixing bowl – a big one is key here as we’ll be tossing a lot of cereal! Ensure you have a sturdy spatula or wooden spoon for mixing. Finally, pre-crush your Nilla Wafers. You can do this by placing them in a zip-top bag and gently crushing them with a rolling pin or the bottom of a glass, or by using a food processor for a finer crum extractb. Set aside a generous amount for topping.
Melting the Foundation: The Marshmallow Base
This is where the magic begin extracts to happen! In a large, microwave-safe bowl, combine the 1 (10 oz) bag of miniature marshmallows with the 3 tablespoons of melted butter. You can melt the butter directly in the bowl if you’re using the microwave, or melt it separately in a small saucepan over low heat. Microwave the marshmallows and butter on high power in 30-second intervals, stirring well after each interval, until the marshmallows are completely melted and smooth. This usually takes about 1 to 2 minutes total, depending on your microwave’s wattage. Be careful not to overheat them, as this can make the mixture tough. Alternatively, if you prefer using the stovetop, melt the butter in a large saucepan over low heat. Add the marshmallows and stir constantly until they are fully melted and smooth. This method offers a bit more control and can be helpful if you’re worried about overheating. Whichever method you choose, the goal is a creamy, homogenous, melted marshmallow mixture.
Infusing the Flavor: Adding the Banana Pudding Mix
Now it’s time to introduce that irresistible banana flavor! Once your marshmallows are beautifully melted and smooth, immediately add the entire 1 (3.4 oz) box of instant banana pudding mix to the bowl with the marshmallow mixture. Work quickly here! The heat from the melted marshmallows will help to bloom the pudding mix, intensifying its flavor and aroma. Stir vigorously with your spatula or wooden spoon until the pudding mix is thoroughly incorporated into the marshmallow mixture. You want to ensure there are no dry pockets of pudding mix remaining. The mixture will take on a lovely pnon-alcoholic ale yellow hue and a delightful banana scent. This step is crucial for achieving the distinct banana pudding flavor that makes these treats so special. Don’t be discouraged if the mixture seems a bit stiff at first; keep stirring until it’s smooth and well combined.
The Grand Toss: Combining Cereal and Marshmallow Mixture
With your banana-infused marshmallow mixture ready, it’s time to add the star ingredient: the Rice Krispies cereal. Add the 6 cups of Rice Krispies cereal directly into the large bowl with the marshmallow and banana pudding mixture. Using your spatula or wooden sgin extractn, begin to gently fold and stir the cereal into the sticky mixture. The key here is to coat every single Rice Krispie with the marshmallow goodness. Continue stirring until all the cereal is evenly coated. Be gentle but thorough. You don’t want to crush the cereal; we want to maintain that signature crispiness. This can be a bit of a workout, as the mixture will be very sticky, but persistence is key. Ensure every nook and cranny of the cereal has a good coating of the banana marshmallow blend.
Pressing and Topping: Shaping Your Treats
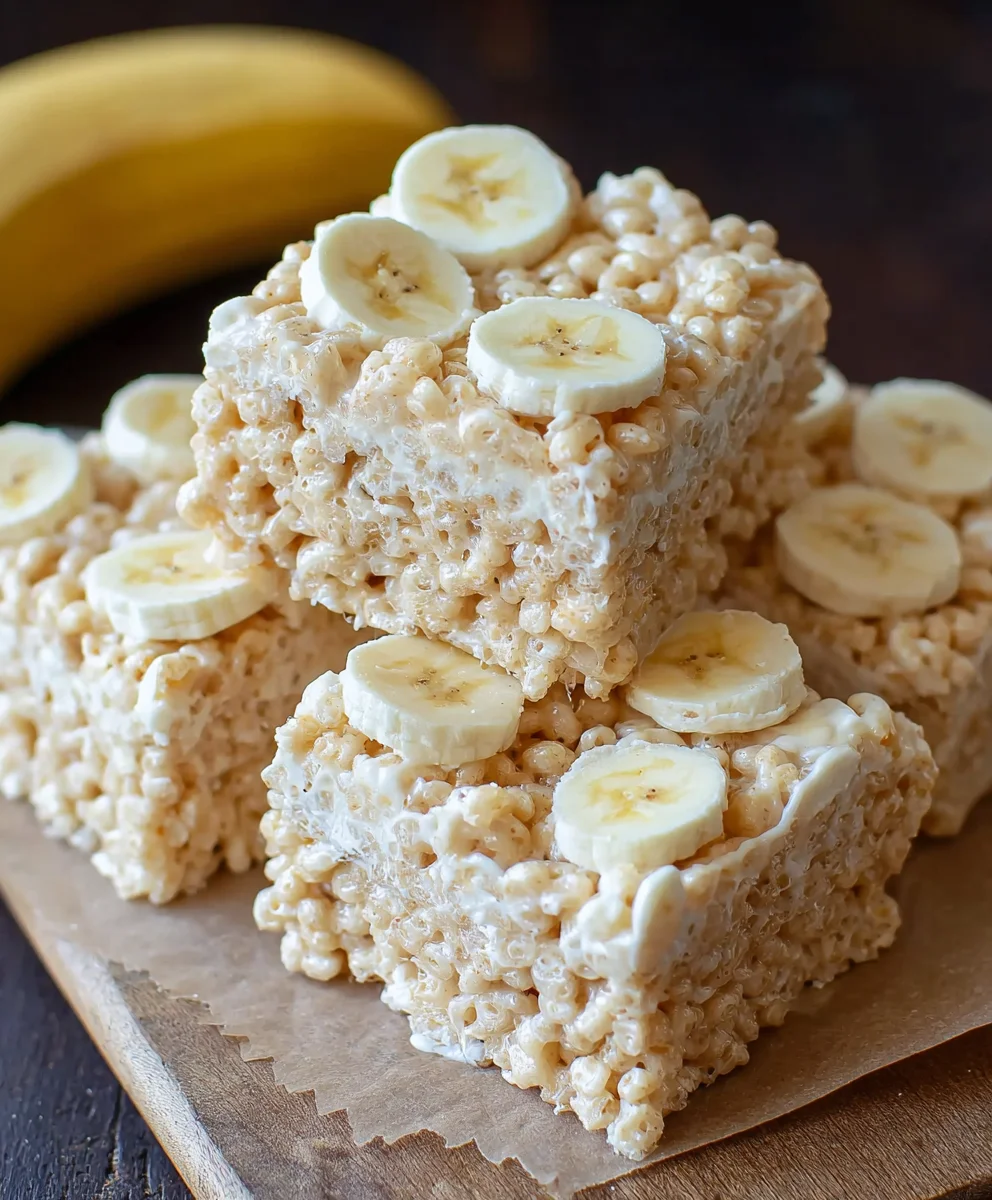
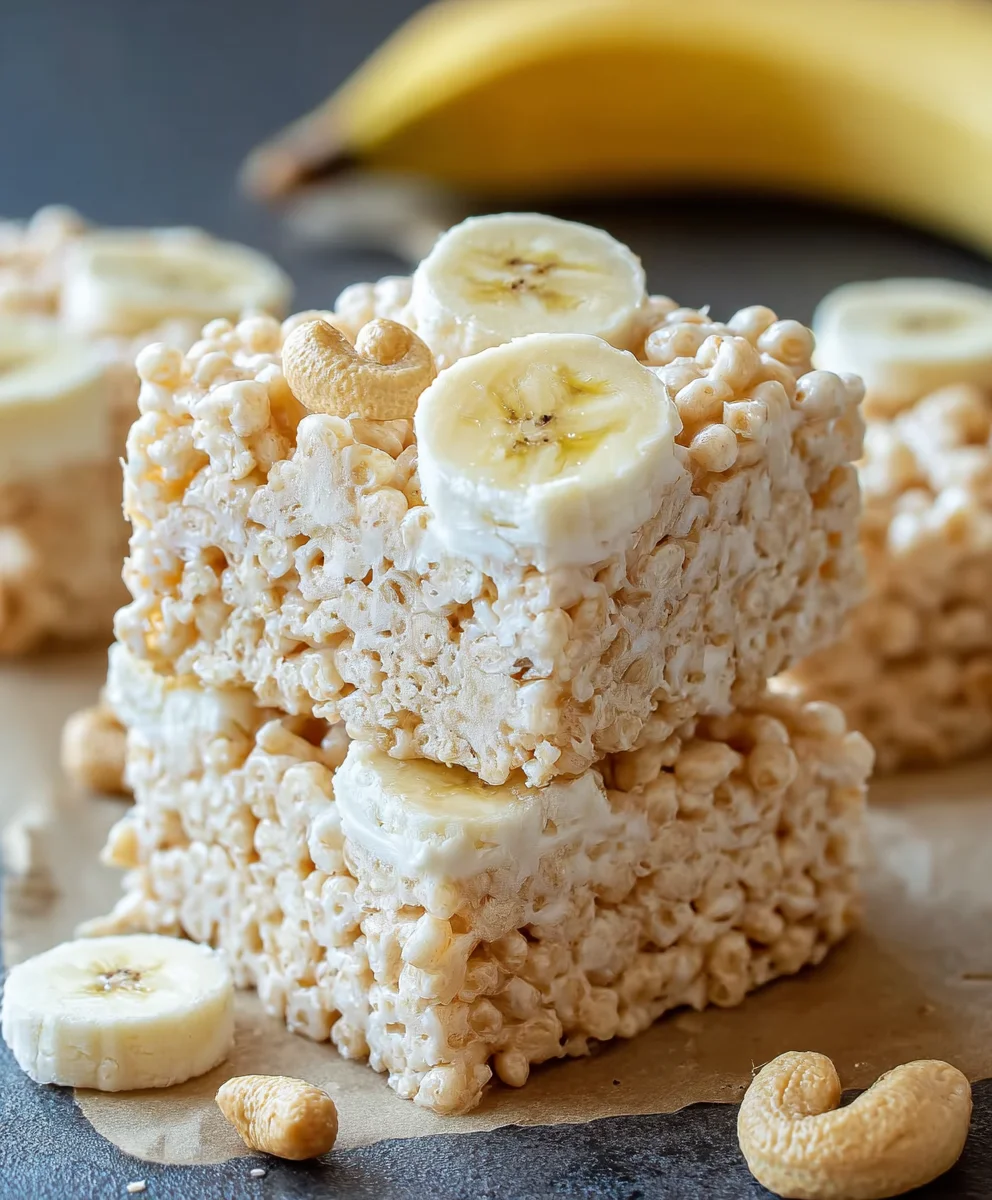
Once the cereal is thoroughly coated, it’s time to get them into the pan. Scrape the mixture into your prepared 8×8 inch baking pan. Now, here’s where things can get a little sticky, so lightly grease your hands or your spatula with a little butter or cooking spray. Gently press the Rice Krispie mixture evenly into the pan. Avoid pressing too hard, as this can make the treats dense and hard. Aim for an even layer so they bake (or set, in this case) uniformly. Once the treats are pressed into the pan, immediately sprinkle the crushed Nilla Wafers generously over the top. You can press them down gently with your hands or spatula to help them adhere to the sticky surface. This topping is essential for mimicking the classic banana pudding experience. The Nilla Wafers add a delightful texture and complement the banana flavor beautifully.
Setting and Slicing: The Final Touches
Allow the treats to cool and set completely in the pan. This usually takes about 1 to 2 hours at room temperature. Resist the urge to cut into them too early, as they need time to firm up. Once they are completely cool and set, use the parchment paper overhang (if you used it) to lift the entire block of treats out of the pan. Place it on a cutting board. Using a sharp knife, cut the treats into squares. For easier cutting, you can lightly grease your knife as well. These Banana Pudding Rice Krispie Treats are best enjoyed fresh, within a day or two of making them. Store any leftovers in an airtight container at room temperature. Enjoy the delightful chewy texture, the sweet banana flavor, and the crunchy Nilla Wafer topping in every bite!
Conclusion:
And there you have it – the delightful and surprisingly simple recipe for Banana Pudding Rice Krispie Treats! We’ve walked through transforming those classic crunchy cereal treats into a creamy, dreamy dessert that echoes the beloved flavors of banana pudding. These treats are a fantastic no-bake option that’s perfect for potlucks, birthday parties, or just a special weekday treat. Their chewy texture, combined with the sweet banana notes and the subtle creaminess, makes them an instant crowd-pleaser.
For serving, these Banana Pudding Rice Krispie Treats are wonderful on their own, but you can elevate them further by drizzling them with a little extra melted white chocolate or even topping them with a dollop of whipped cream and a thin slice of fresh banana. They also pair beautifully with a cold glass of milk.
Don’t be afraid to experiment with variations! For a richer banana flavor, consider adding a touch of banana extract to the marshmallow mixture. You could also fold in some crushed vanilla wafers for an extra textural element reminiscent of traditional banana pudding. And for a fun twist, try adding a few chocolate chips for a hint of indulgence. I encourage you to give these Banana Pudding Rice Krispie Treats a try; they are sure to become a new favorite!
Frequently Asked Questions
Q: Can I make these Banana Pudding Rice Krispie Treats ahead of time?
Absolutely! These treats store very well. It’s best to let them set completely before cutting and storing them in an airtight container at room temperature. They typically stay fresh and delicious for 2-3 days.
Q: What kind of bananas should I use for the flavor?
For the best banana flavor in your Banana Pudding Rice Krispie Treats, I recommend using very ripe or even slightly overripe fresh bananas. The riper the banana, the more intense and sweet its flavor will be. Mash them well to ensure even distribution throughout the treats.
Banana Pudding Rice Krispie Treats
An easy and delicious no-bake dessert that combines the classic flavors of banana pudding with the delightful chewiness of Rice Krispie treats, all topped with crushed Nilla Wafers.
Ingredients
-
3 tablespoons butter, melted
-
1 (10 oz) bag miniature marshmallows
-
1 (3.4 oz) box instant banana pudding mix
-
6 cups Rice Krispies cereal
-
Crushed Nilla Wafers, for topping
Instructions
-
Step 1
Prepare your workspace: Lightly grease an 8×8 inch baking pan or line it with parchment paper. Gather all ingredients and pre-crush Nilla Wafers for topping. -
Step 2
Melt the marshmallows: In a large microwave-safe bowl, combine miniature marshmallows and melted butter. Microwave in 30-second intervals, stirring after each, until completely melted and smooth. Alternatively, melt over low heat on the stovetop. -
Step 3
Add banana pudding mix: Immediately stir the instant banana pudding mix into the melted marshmallow mixture until thoroughly incorporated. Stir vigorously until smooth and uniformly yellow. -
Step 4
Combine with cereal: Add the Rice Krispies cereal to the bowl with the banana-infused marshmallow mixture. Gently fold and stir until all the cereal is evenly coated. Be thorough but gentle to maintain crispiness. -
Step 5
Press into pan and top: Scrape the mixture into the prepared baking pan. Lightly grease your hands or spatula and gently press the mixture evenly into the pan. Sprinkle generously with crushed Nilla Wafers and press them lightly to adhere. -
Step 6
Cool and slice: Allow the treats to cool and set completely in the pan, about 1 to 2 hours at room temperature. Once firm, lift out of the pan and cut into squares using a sharp knife.
Important Information
Nutrition Facts (Per Serving)
It is important to consider this information as approximate and not to use it as definitive health advice.
Allergy Information
Please check ingredients for potential allergens and consult a health professional if in doubt.